Whenever you connect to a new Wi-Fi connection on the Windows 10 PC, it creates Wireless Network (Wi-Fi) connection and keeps passphrases accompany by other settings and keep it in a list of network profiles. In a lifetime, we connect our system with various Wi-Fi connection and due to which the list of profiles become quite large. Now you want to remove the Wi-Fi connection so that you only see the list of connection which you use usually. Or, You want to set up your Wi-Fi network from scratch its because you want to troubleshoot or fix the network connection problem. In both situations, one thing is common, i.e. You need to forget a Wi-Fi network from your Windows 10 PC. In the earlier versions of Windows like Windows 7, the process to delete Wi-Fi network was easy; you need to head over to Network and Sharing Center in Control Panel -> Manage Wireless Network -> Delete saved network. In Windows 8, the same option (in Windows 7) was removed, by the company and you need to take help of CMD commands to delete Wi-Fi network.
How to Forget Wi-Fi Network Profile in Windows 10
In Windows 10, the company decided to include the same in the Settings app so that users can easily delete a saved Wi-Fi Network in Windows 10.
Using the Settings app
Launch Settings app. For that, Press WIN + I hotkeys
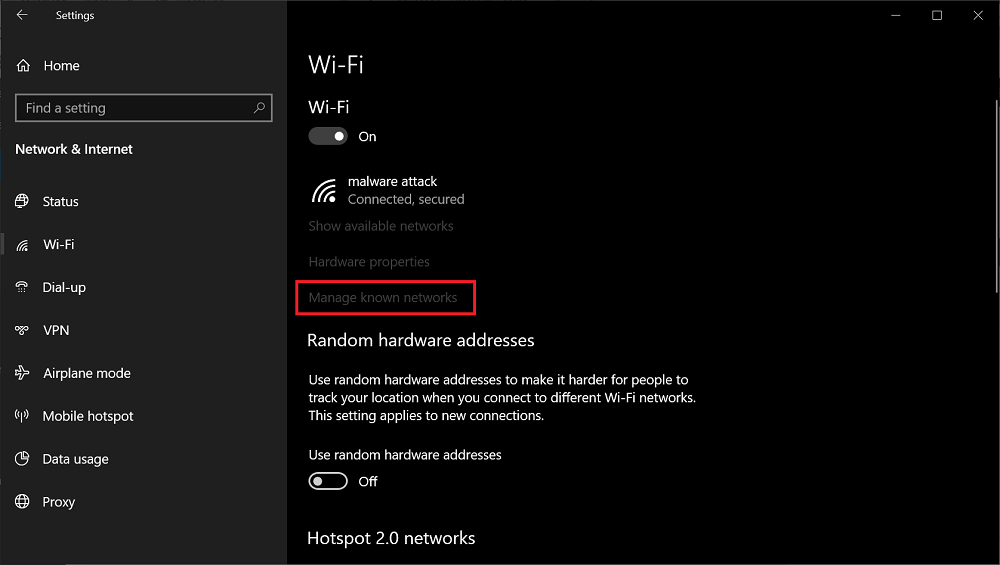
Click on the Network & Internet -> Wi-Fi.
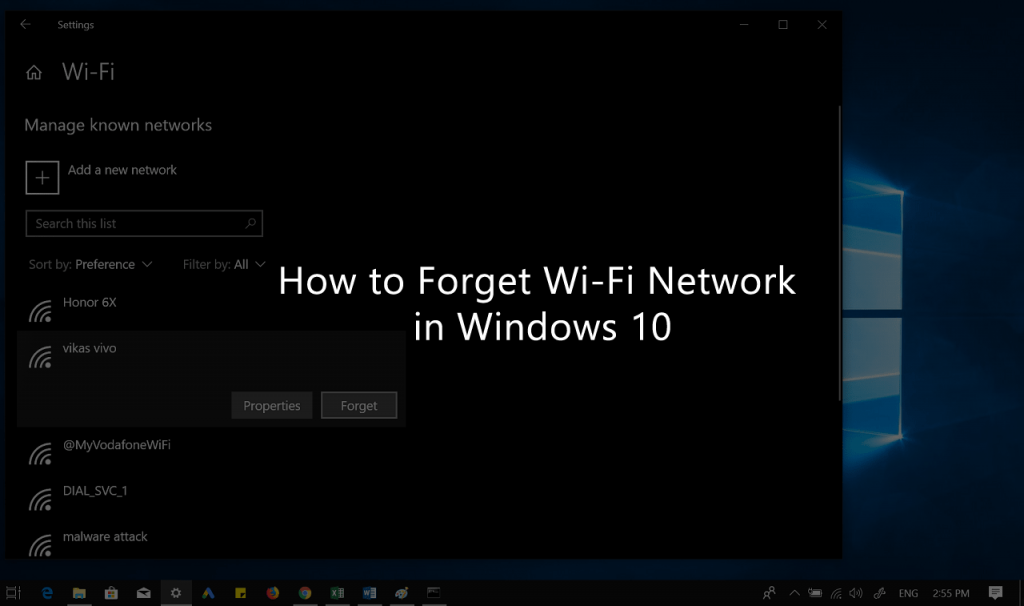
On the right pane, click on the link which reads “Manage known networks.” listed under Wi-Fi section.
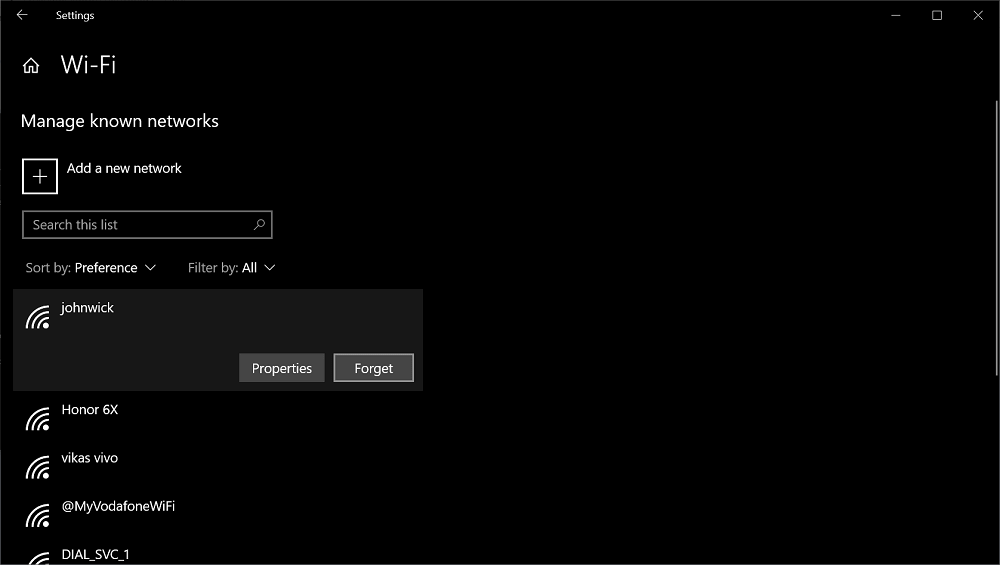
On the Next page, you will get the list of known Wi-Fi networks. Click on the network and then click on the Forget button to forget the Wi-Fi network permanently. You can check the above screen, in which I have forgotten the “Johnwick” Wireless Network profile from the computer. In case, you want to delete the active Wi-Fi network connection, then you can also do that more quickly. here, what you need to do:
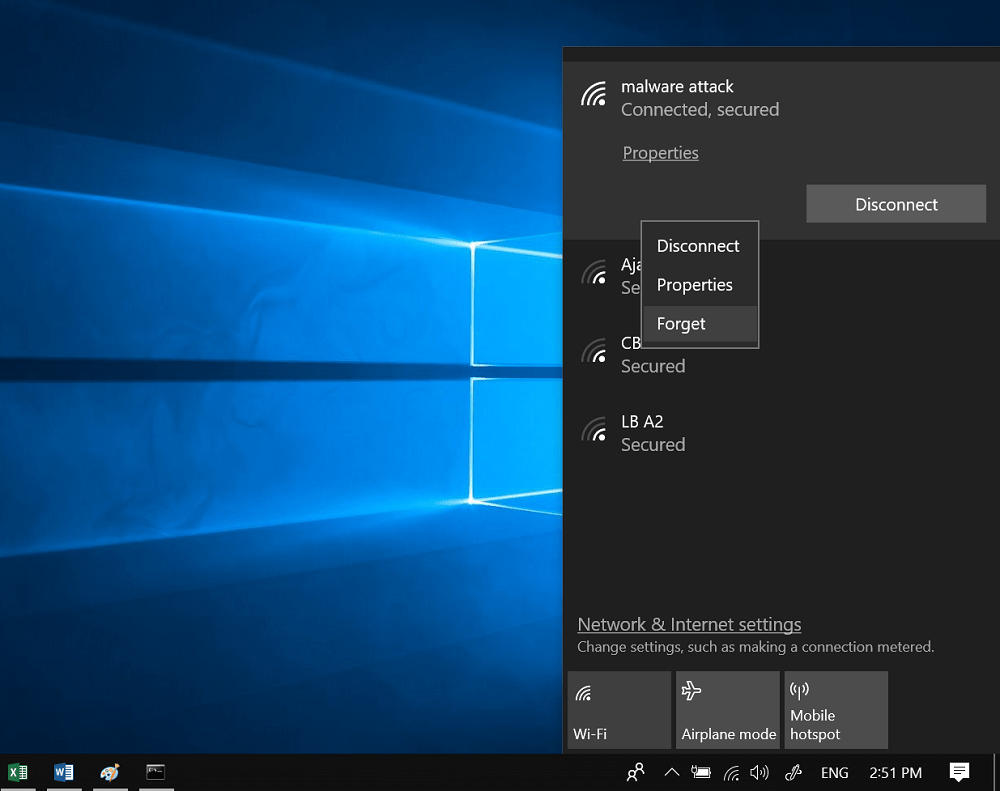
Click on the Wi-Fi icon available on the Windows 10 taskbar (Bottom right corner)
This will show you the name of wireless connection with whom your computer is connected accompanied by a list of connection available.
You need to right click on the Wi-Fi connection profile your system is connected. This will show you a different option, select Forget. This will remove the connection from the system.
Using Command Prompt
There is an alternate method to delete Wi-Fi Network profile in Windows 10 in which you need to take help of CMD commands to achieve the same thing. Here’s what you need to do:
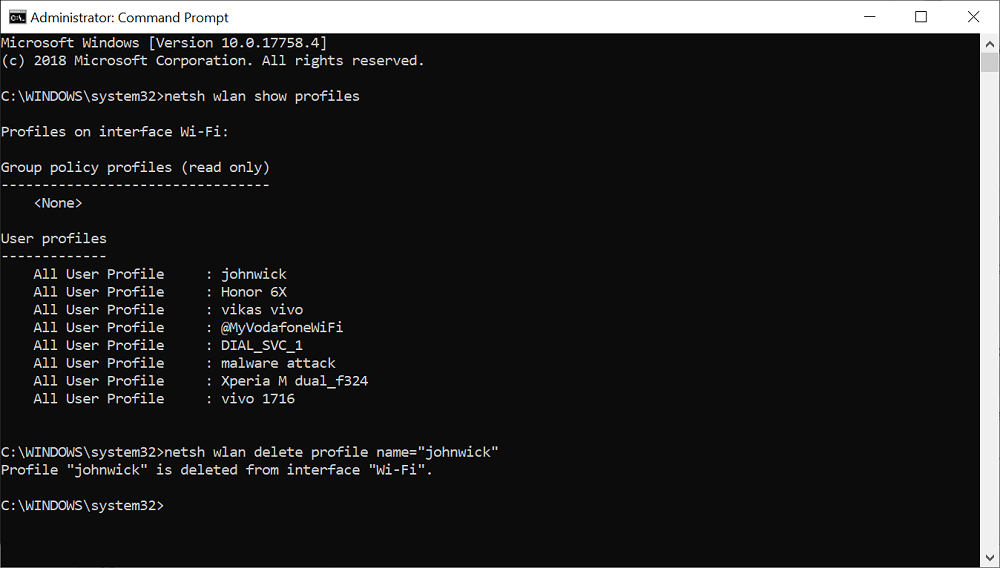
- Launch Elevated Command Prompt. For that, type CMD in start menu search and select Run as administrator. If UAC dialog box, click Yes to continue. 2.. Next, In the command prompt terminal type the following command and hit Enter. This will show you a list of all the Wi-Fi networks saved on your Windows 10 PC.
- Now you need to look for the name of the Wi-Fi network profile which you want to forget. After that type the following command. Make sure to replace “PROFILE NAME” with a name of the Wi-Fi network which you want to forget. For example, as shown in the screenshot name of the network profile which I want to forget “Johnwick.” The above command will be “netsh wlan delete profile name=”Johnwick.”
In a fraction of seconds, you will receive a message i.e. Profile “Your Profile” is deleted from Interface “Wi-Fi.” That’s it! In comparison to the earlier version of the Windows operating system, removing Wi-Fi Network in Windows 10 is super easy. You need to launch the Settings app and make a few clicks. Find this blog post useful? Is there any way available to forget Wi-Fi Network in Windows 10? Let me know in the comment. Which method do you find comfortable? Using the Settings app or by Command Prompt.