It’s because, without a microphone, it is possible that will be able to see the person on the other side, but that person might not be able to listen to your voice. Usually most of the programs and online services that offer an option to communicate with other people automatically turn on the microphone. Sometimes you find out, even the microphone is on still a person on the other side is unable to listen to your voice.
How to Allow Desktop Apps to Use Microphone in Windows 11
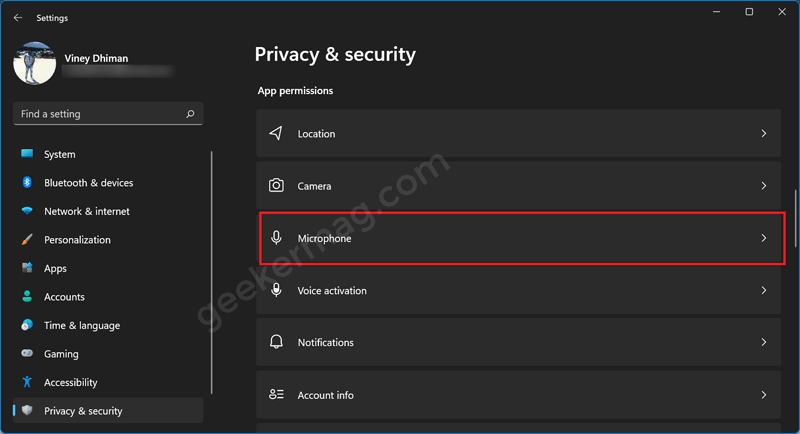
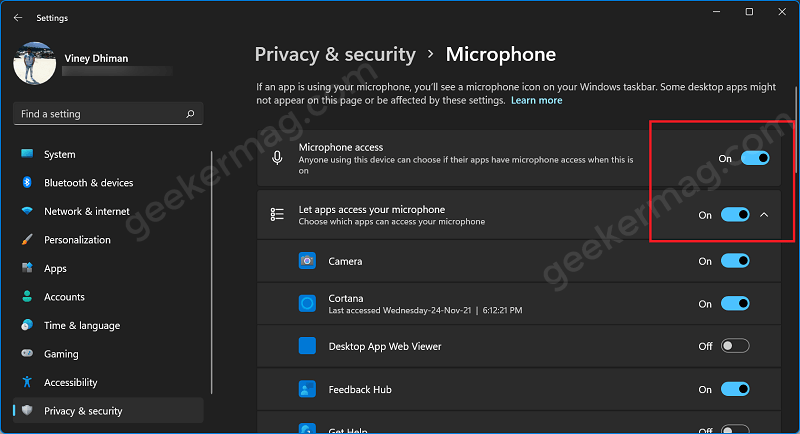
If you’re using Windows 11, then it is possible that the Microphone option is off for a particular app. Fortunately, there’s a dedicated setting page from where you can allow desktop apps to use a microphone. If you want to enable this option, then this guide will help you with that. Click on the Search icon and then from the search menu, search for the Settings. When it appears in search results, click to open it. You can either press the Windows + I key combo to open the Settings app. On the left side, switch to Privacy & Security tab, and then on the right side, head over to the Apps Permission section and select Microphone. Here, enable the toggle saying Microphone access and Let apps access your microphone. This will turn on Microphone access to all desktop apps. In case, you want to manage microphone access to individuals or a particular app, then you will find a list of all desktop apps that need microphone access. You can turn it ON or OFF. This will enable the desktop apps to use the microphone in Windows 11. Following the above steps, you will be able to allow mic access to the apps.