When you start your computer in safe mode, the device loads up with the necessary drivers. As a result, Troubleshooting the issue with Safe Mode is a faster and most convenient method to resolve issues in Windows 11. Let’s learn more about Safe mode. There are three distinct forms of Safe Mode. Safe Mode: This is the most basic mode, with only minimal drivers and no third-party software installed. It is not possible to see much detail in the visuals because only the basic drivers are installed, thus the icons appear to be large and unclear. In addition, Safe Mode would be labeled in the screen’s four corners. Safe Mode with Networking: In this situation, network drivers will be loaded in addition to the drivers and configurations that have already been loaded. While this allows you to access the internet in safe mode, you should avoid browsing the web while Windows is launching in Safe Mode. Safe Mode with Command Prompt: As soon as you choose this option, you will only be presented with a Command Prompt window on your screen and no other Windows GUI. Users can utilize this for further in-depth troubleshooting. Now that you are familiar with the many forms of Safe Mode and can select the appropriate option when presented, let us move on to the various ways to start Windows 11 in Safe Mode.
How to Boot Windows 11 in Safe Mode
There are two ways to boot into Safe mode in Windows 11. The easy method and long cum complicated method. In this blog post we will cover both, let’s start with the first one:
Boot into Windows 11 Safe Mode using System Configuration
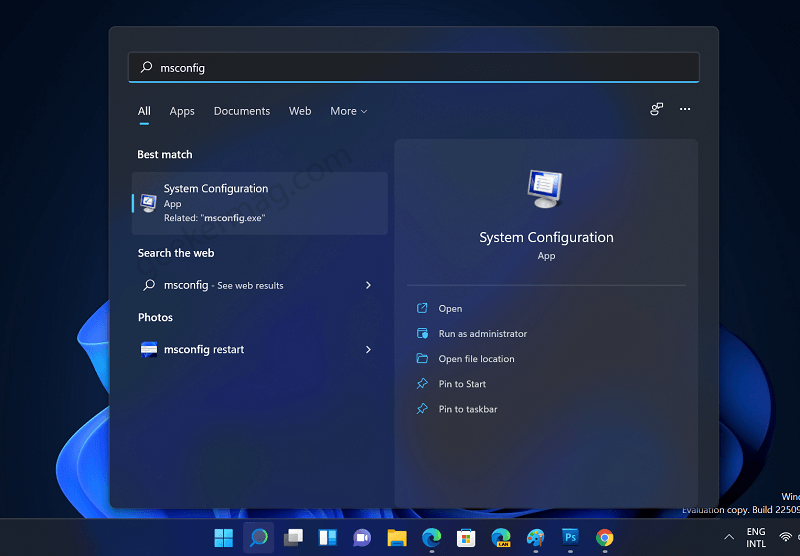
Click on the Search icon and type msconfig, when the System Configuration appears in search results, click to open it. In the System configuration app, switch to the Boot tab and then head over to the Boot options section and check the box for Safe boot. Click on Apply and then OK. Instantly, a dialog box will appear asking you to restart your computer. Click on the Restart and now your system will boot directly into Safe mode in Windows 11.
Boot into Windows 11 Safe Mode using WinRE
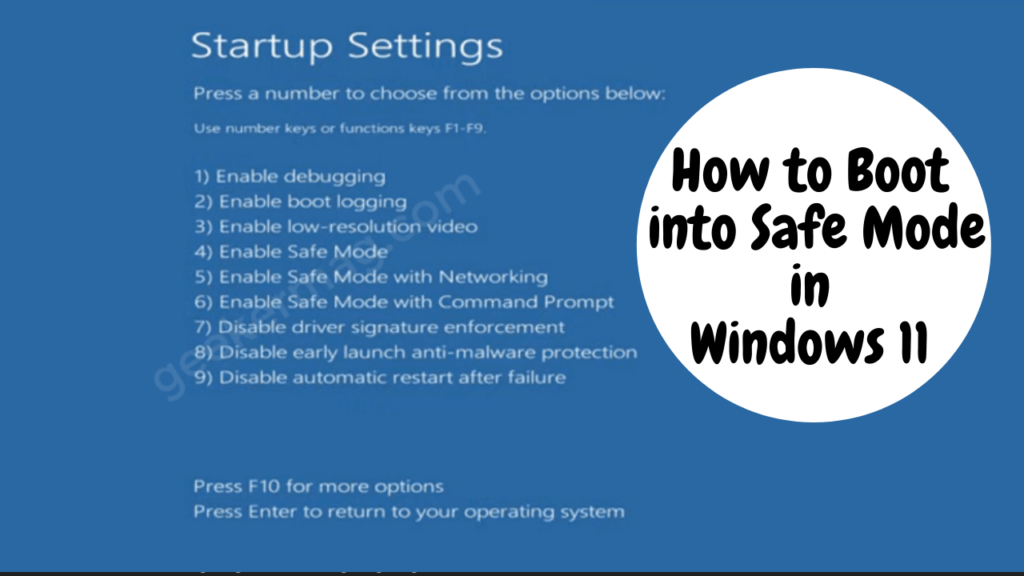
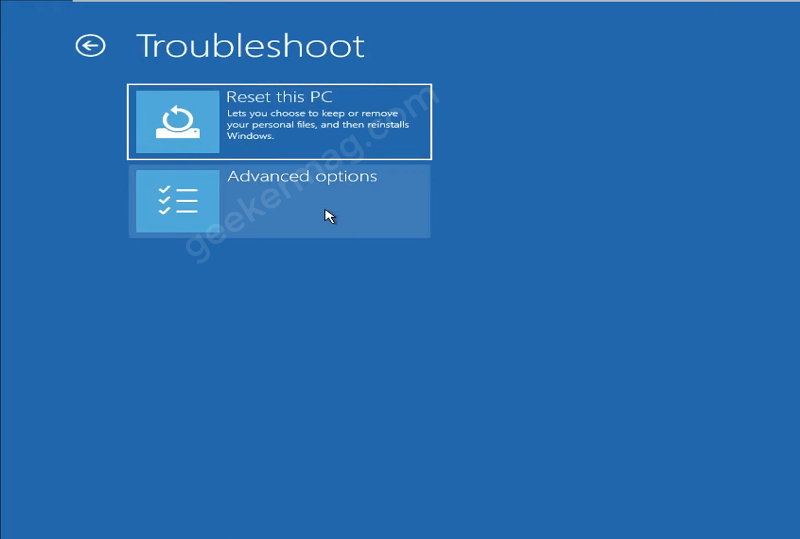
To boot into Safe mode in Windows 11 using this method first of all need to boot into Windows 11 Recovery Environment (WinRE) in Windows 11. Use one of the methods listed on our dedicated page about WinRE. Once you reach the following screen i.e. Windows Recovery Environment in Windows 11 In the Choose an option screen, select Troubleshoot. In the Troubleshoot screen, click on “Advanced Options“. There will now be a variety of options presented to you on the screen. ‘Startup Settings‘ should be selected. Under Startup Settings, you’ll find all of Windows’ startup choices, then click ‘Restart‘ in the lower-right corner. Options numbered one through nine will now appear on the screen. ‘Safe Mode‘ is represented by the numbers four through six. Use the corresponding number keys (4, 5, or 6) or the function keys to start Windows in Safe Mode (F4, F5, or F6). Once you’re done with your work in Safe mode, just perform a regular restart to exit the Safe mode in Windows 11. In case, you’re stuck in Windows 11 Safe mode, then check out the blog post on Fix – Unable to Exit Safe mode in Windows 11.