OneDrive is bundled with Windows 11, which means whenever you install Windows 11 it’s available on your PC, you need to log in using your credential and start using it. Although the OneDrive sync feature is handy. Sometimes, you want to cancel or stop sync in OneDrive. There could be various reasons behind it which are as follow:
It keeps asking users to sync data available on the PC to the cloud which annoyIt is taking too much time to upload and download data on OneDrive. Slow down your internet speed.Syncing happens in the background and when it’s uploading a big file. It may slow down the performance of the systemYou installed Windows 11 and the first thing you want to do is stop OneDrive
Apart from that, there could be other reasons as well.
How to Cancel or Stop Sync in OneDrive in Windows 11
No matter what brings you to this web page. The good thing is you will find instructions on cancel or stop sync in OneDrive.
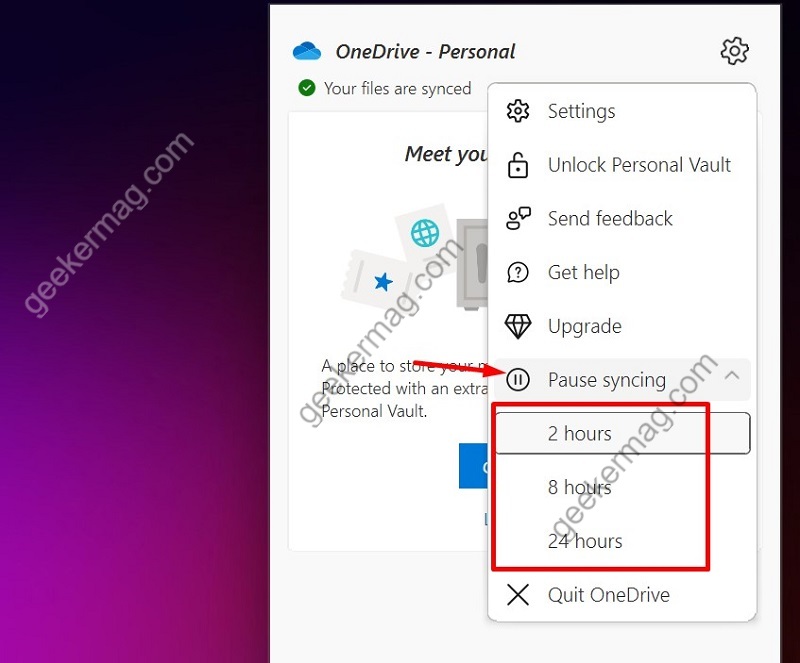
Method 1: Pause (Temporarily Stop) Sync on OneDrive
Open OneDrive from the taskbar and then click on the Gear icon to open help and Settings in the top right corner. Here expand the pause option to pause sync for a specific time. You can pause OnceDrive sync for 2 hours, 8 hours, or 24 hours.
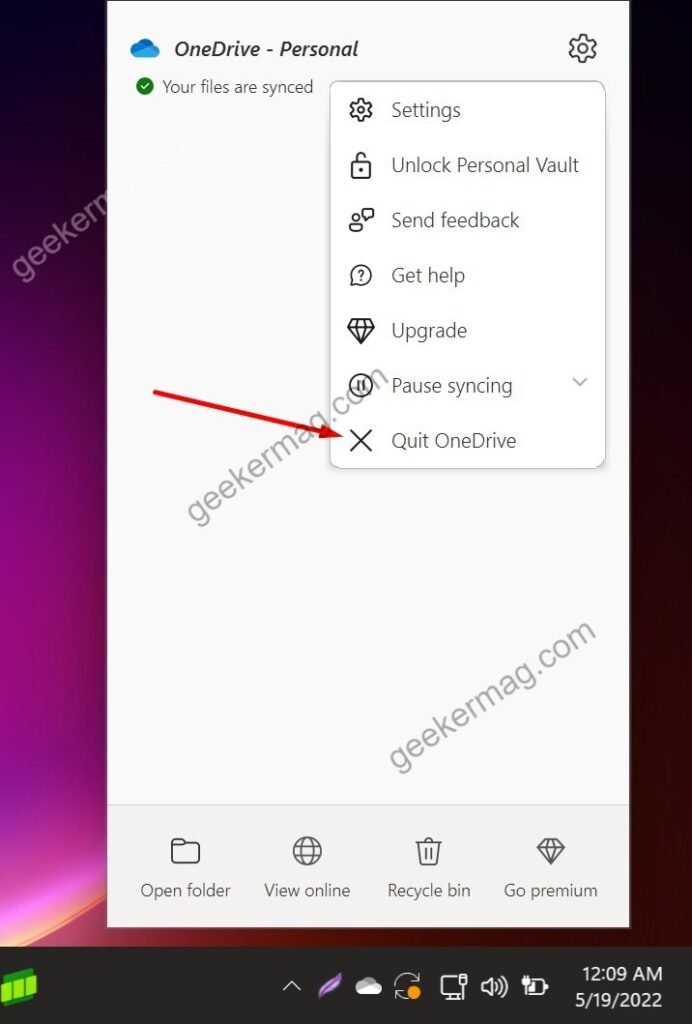
Method 2: Quit OneDrive App
Another method to pause OneDrive Sync is to quit the Onedrive App. For this, follow these steps: Click on the OneDrive icon in the taskbar and click on the settings button. Then click on the gear icon for Help and Settings. Find and click on the Quit to close the OneDrive. This will close all Onedrive related services and also quit the sync process. Next time you want to use the OneDrive app and its sync feature, then you need to open the app from the start, and then it will start working.
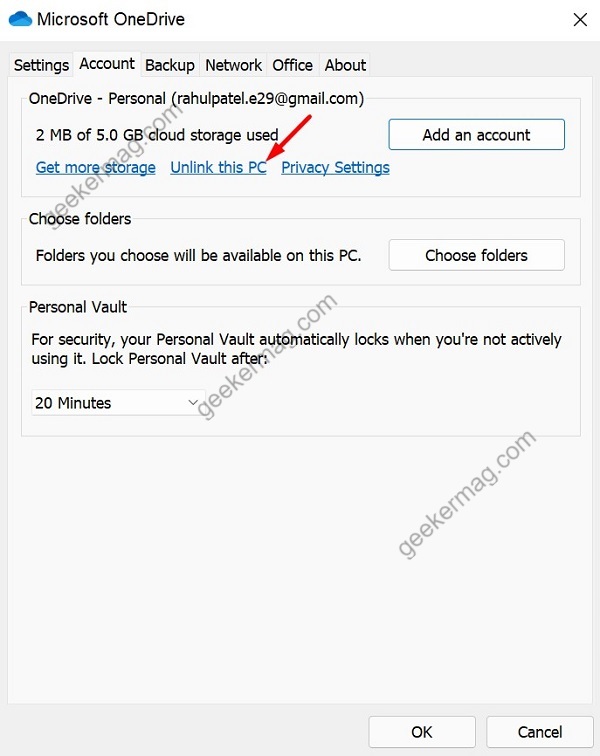
Unlink OneDrive account from Windows 11 PC
Click on the OneDrive icon in the taskbar and then click on the Settings button. In the Settings, go to the Account tab and click on Unlink this PC. This option will remove your account from the OneDrive app. After that, it won’t sync your data.
Change Sync Settings
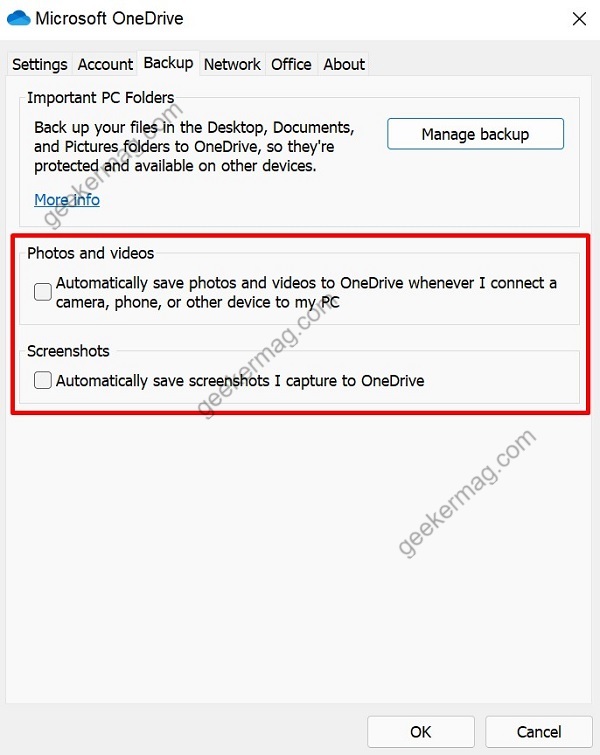
You can also change sync settings to stop or pause sync settings. Open OneDrive Settings using the above steps and then go to the backup tab. Uncheck the box next to “Automatically save photos and videos to OneDrive whenever I connect a camera, phone, or other devices to my PC” and “Automatically save screenshots I capture to OneDrive“. This will stop syncing your data to OneDrive.
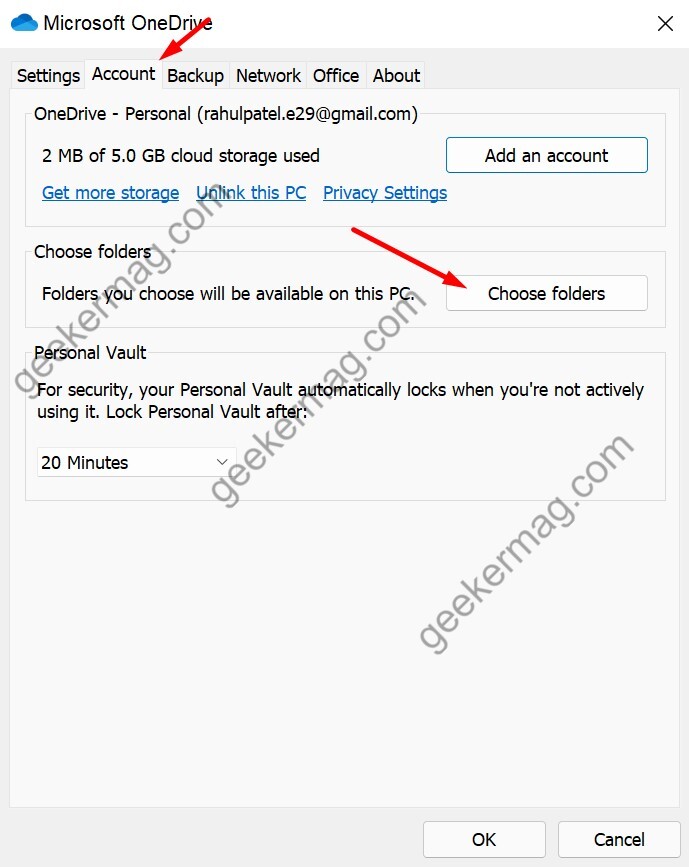
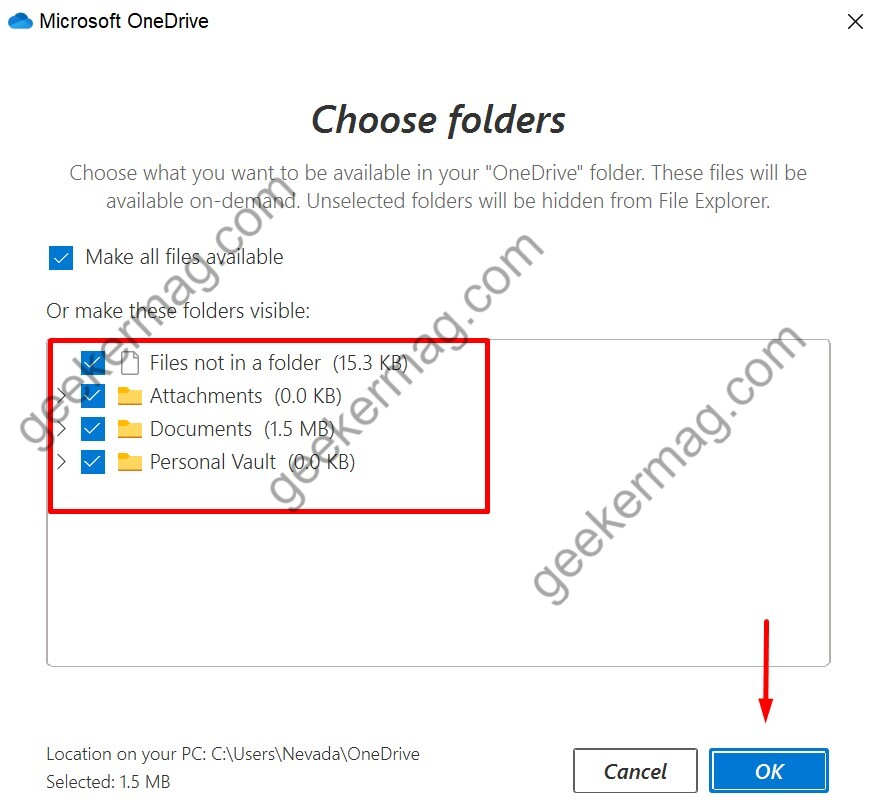
Select the OneDrive Folders to Sync
You can also decide which folder to sync with OneDrive. For this, open the OneDrive settings. Go to the Account tab and then Choose folders. Uncheck folders you do not want to sync to your computer. Once done, click on OK. This will save your settings. Next time when OneDrive syncs data, it will skip your unchecked folders. That’s it! So these are some of the possible ways using which you can cancel or Stop Sync (Permanently or temporarily) in OneDrive in Windows 11. You can try one of the solutions discussed above according to your requirements. Let us know in the comments, why you want to stop OneDrive sync in Windows 11.
![]()
![]()
![]()