6 Ways To Clean Install Windows 11
Clean installing Windows refers to wiping the entire storage and installing a newer version of Windows. It can be done in six ways, and this section explains them in detail. Note: Before clean installing Windows 11, you must check whether your Windows system can be upgraded to Windows 11 or not. You can use the PC Health Check app to check the same.
1. From ISO File
Microsoft has officially released the ISO file of the latest Windows 11. You can use the official Windows 11 Disk Image to install the new Windows 11 without any previous data. Below are the steps to clean install Windows 11 using the Windows 11 ISO.
- Download and save the Windows 11 Disk Image.
- Once the Windows 11 ISO file is downloaded and saved on your system, move to the folder where you saved the ISO file. In most cases, it automatically saves in the Downloads folder.
- Find the Win11_English_x64v1 file in the Downloads and right-click on it.
- Select the Mount option from the Windows contextual menu.
- Choose the virtual drive from the left sidebar.
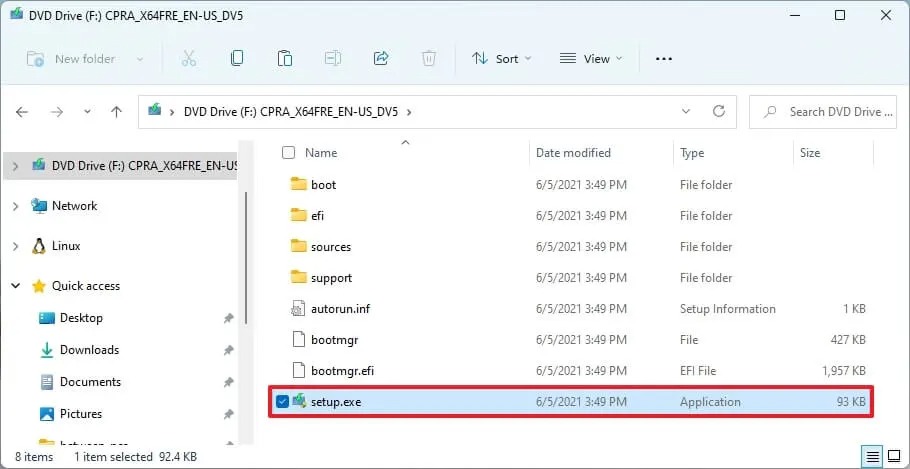
- Look for the Setup.exe file in the virtual drive and double-click on it.
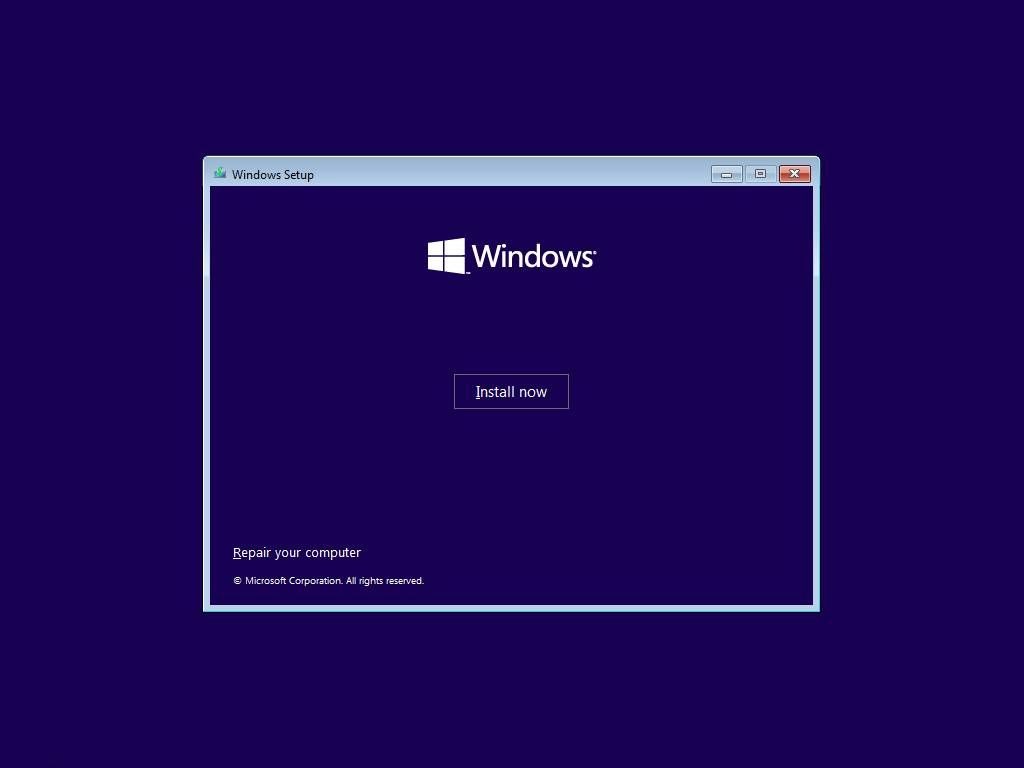
- Once the Setup.exe file is launched, the Windows 11 setup wizard will appear on the screen.
- Click on Next on the Install Windows 11 screen.
- Choose Not right now and click on the Next button.
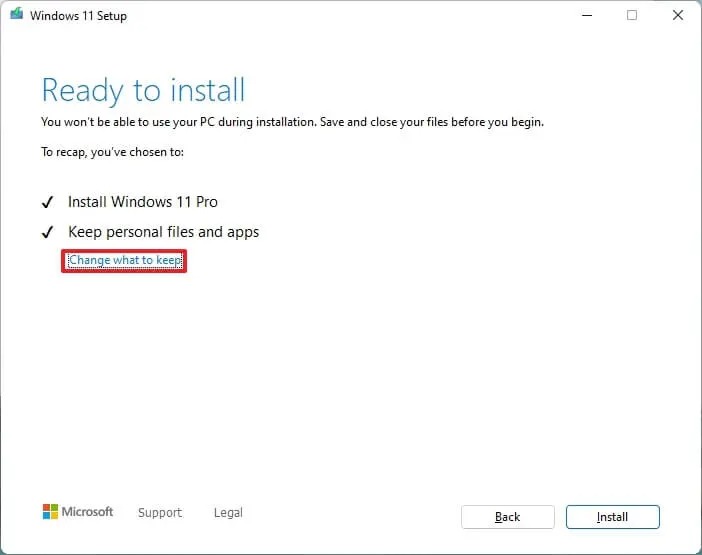
- Follow the on-screen instructions and pause once you reach the Ready to install screen.
- Click on Change what to keep on the Ready to install window.
- Select Nothing in the Choose what to keep section.
- Click on Next and then Install to start the Windows 11 installation process.
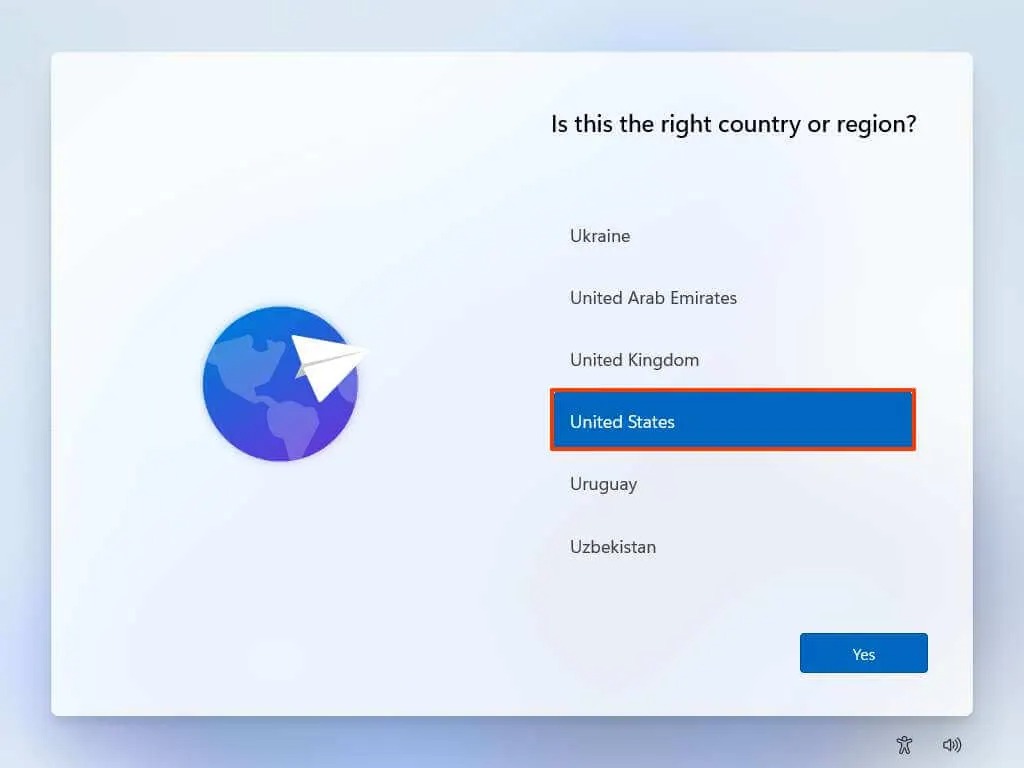
- Select your preferred Region and Language in which you want to install Windows 11 on your PC.
- Keep following the on-screen instructions until the Welcome Back! (Your Name) screen appears.
- On Welcome Back! (Your Name) screen, select Set up as new device option to not include the previously installed data while installing the latest Windows 11.
- Click Next and start configuring the privacy and security settings. We suggest going with the default privacy and security settings. Once you complete the entire process, the clean install will begin and may take a while to install and set up the new Windows 11 on your system as per your selected preferences.
2. Using Rufus Software
Using Rufus is another helpful method to install Windows 11 without any previous data and settings. You can use this software to create a bootable installation media and clean install Windows 11. It’s pretty easy to make bootable installation media with Rufus, and the mentioned steps demonstrate the same.
- Download the Windows 11 ISO file.
- Download the Rufus software and install it on your system.
- Open the Rufus software, and select your USB flash drive in the Device section.
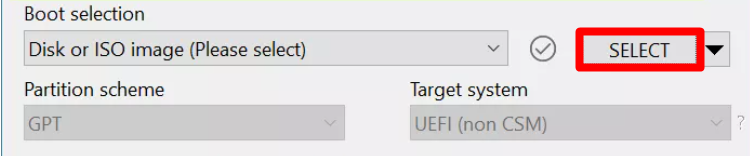
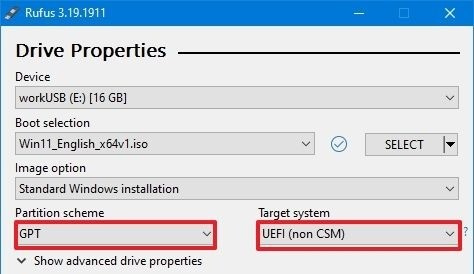
- Click SELECT and choose the Windows 11 ISO file stored on your Windows system.
- Once the Windows 11 Disk Image file is selected, set the Image option to Standard Windows Installation.
- Select the Partition scheme to GPT and Target scheme to UEFI.
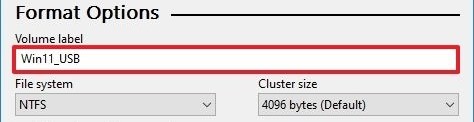
- Give a name to your new bootable drive in the Volume label. In our case, we are naming it ‘Win11_USB.
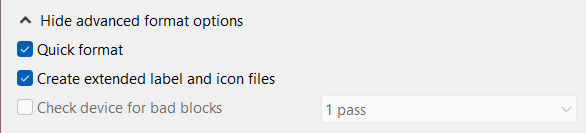
- Click on Show advanced format options to open additional options.
- Check the Quick format and Create extended label checkboxes.
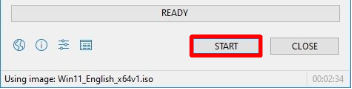
- Click the START button to start the bootable drive creation process.
- Once the process is completed, click the OK button to confirm.
- Lastly, click on Close. Your selected USB drive has now been converted into a bootable Windows 11 USB drive.
- Once the steps are completed, you can start the Windows 11 clean installation process.
- Head to the Recovery section of the Settings app.
- Click on Restart now under the Advanced startup section.
- You will now see the Advanced Startup settings on the screen.
- Select the Choose a device option and choose EFI USB Device from the list of devices.
- Click on the Next button and then Install now.
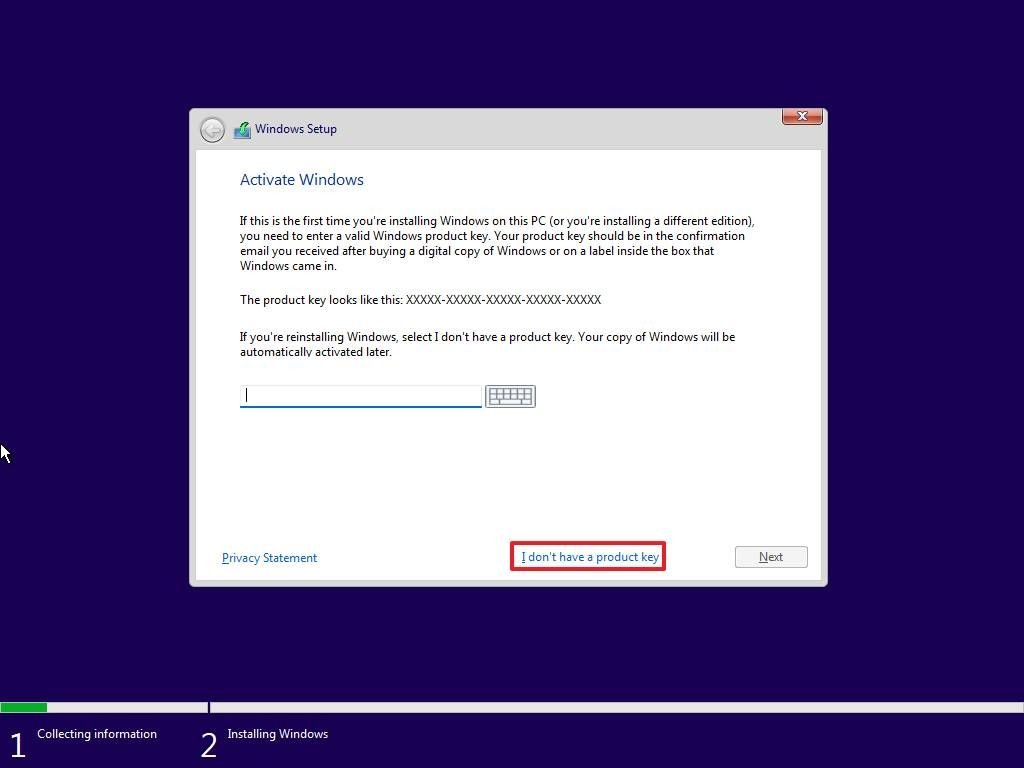
- Select I don’t have a product key option on the Activate Windows screen. You don’t need to enter the product key because this isn’t the first time you are installing Windows 11. (Note: You will need the product key if you are upgrading it from Windows 10 to Windows 11.
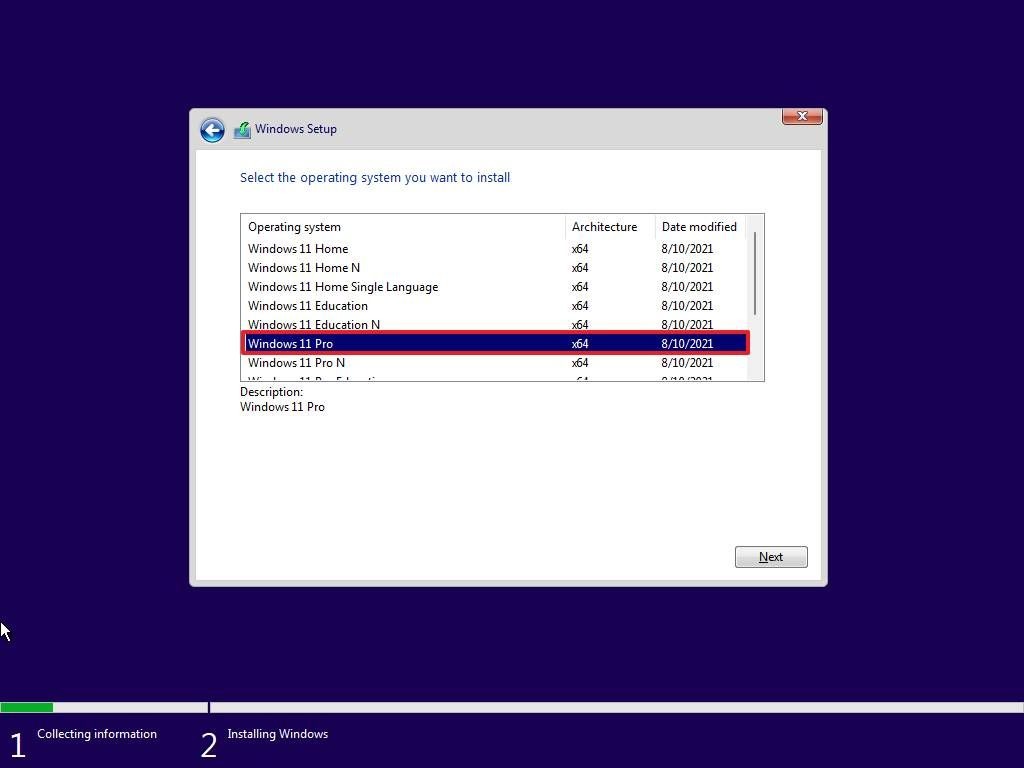
- Click on Next and then select the Windows 11 edition you want to install. It should match with your Windows Activation License key.
- Click on the Next option and then select I accept the license terms to continue.
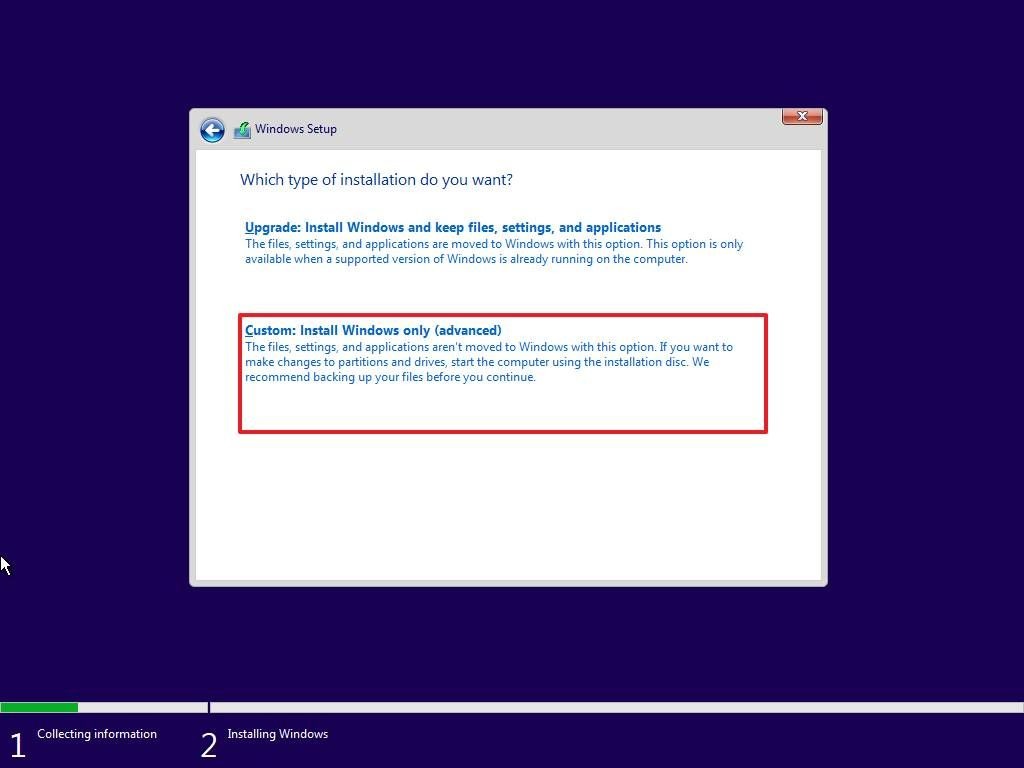
- Select the Custom: Install Windows only (Advanced) option because you don’t want to incorporate previous files in the new Windows 11.
- You need to delete the drive on which you had previously installed Windows. Select the drive and press the Delete option to delete it.
- Click on Next, and that’s it. You’ll now see the new Windows 11 is now installed on your Windows system from scratch. However, you must follow some on-screen instructions to set up the recently installed Windows 11.
3. Through UUP Dump
UUP Dump is a website that acts as a facilitator and helps you fetch all Windows major and minor updates directly from Microsoft’s update servers. You can download the Windows 11 ISO file from UUP Dump and use it to clean install the brand-new Windows 11. We have explained the entire process in detail in the mentioned steps.
- Download Windows 11 ISO File from UUP Dump.
- You need to extract the Windows 11 ISO zip folder you have downloaded by following Step 1.
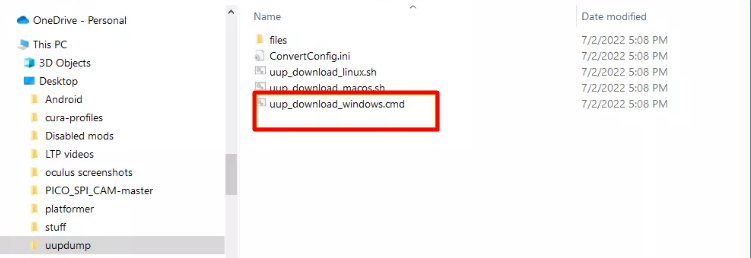
- Open the extracted folder and double-click on the uup_download_windows.cmd command script.
- Click on Run Anyway to run the script in the Command Prompt.
- Click on OK on the Windows User Account Control popup.
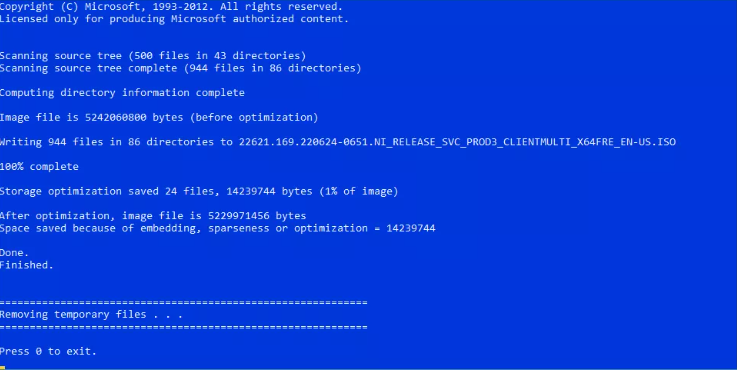
- Once the process is completed, you will see the Windows 11 ISO file in the location where the uup_download_windows.cmd command script is stored.
- Wait until the Windows 11 ISO file extraction process completes.
- Once the process is finished, you can see the Windows 11 Disk Image in the same extracted folder.
- Head to Method 1 of this article and follow the same steps (Step 3 to Step 16) with the Windows 11 ISO file.
4. Using Reset This PC Option
You can also clean install the latest Windows 11 from the Windows’s Settings app. Notably, it’s one of the easiest methods to clean install Windows 11 as it allows you to fresh install the Windows 11 in a few simple steps. Follow us along to do the same.
- Press Windows + I to open the Settings app.
- Head to the Recovery settings.
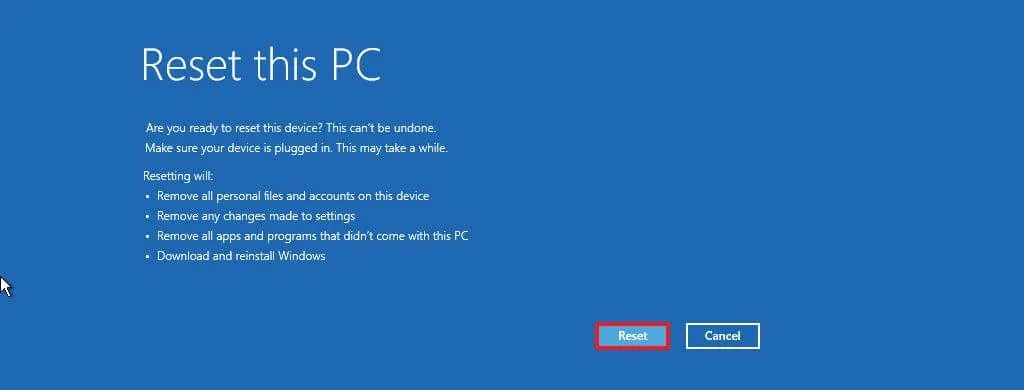
- Click on the Reset PC option under the Reset this PC section.
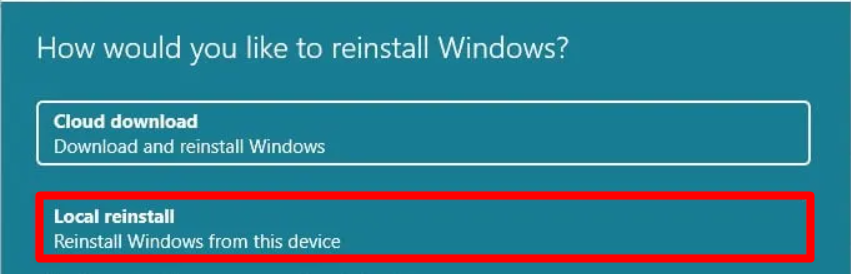
- Select the Remove everything option and then choose Local reinstall.
- Click on Next.
- Then, click on the Confirm button.
- Click Reset on the next screen to erase the entire hard drive and let the system reinstall the new version of Windows, i.e., Windows 11.
- That’s it. Follow the on-screen steps to set up the newly-installed Windows 11 PC.
5. From Advanced Startups Options
All Windows systems come with Advanced Startup settings that enable us to reset our system. You can also reset your system from the Advanced Startup settings and reinstall Windows 11 without any previous data. Follow the below-mentioned steps to thoroughly look at the process and perform it.
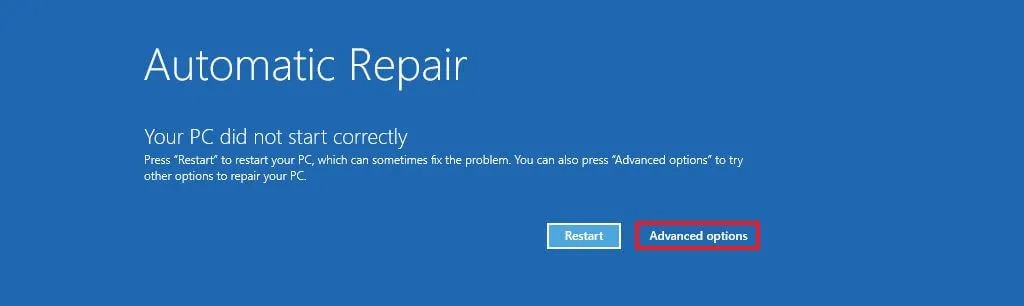
- Press the Power Button and again press the Power Button as soon as the startup screen appears. You need to perform this step two or three times or until you see the Automatic Repair window.
- Click on the Advanced startup option on the Automatic Repair window.
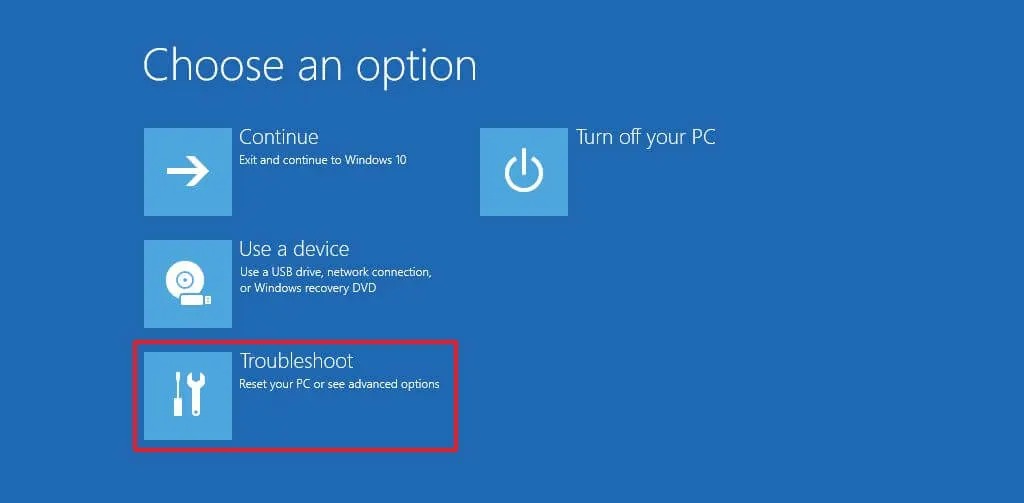
- Select the Troubleshoot option on the Choose an option screen.
- Click on Reset this PC and select Remove everything to delete everything stored on your existing storage.
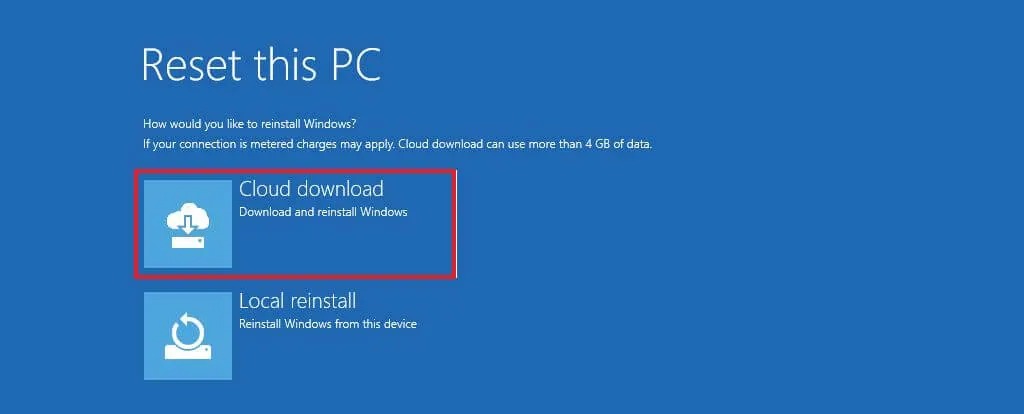
- Select Cloud download on the Reset this PC screen.
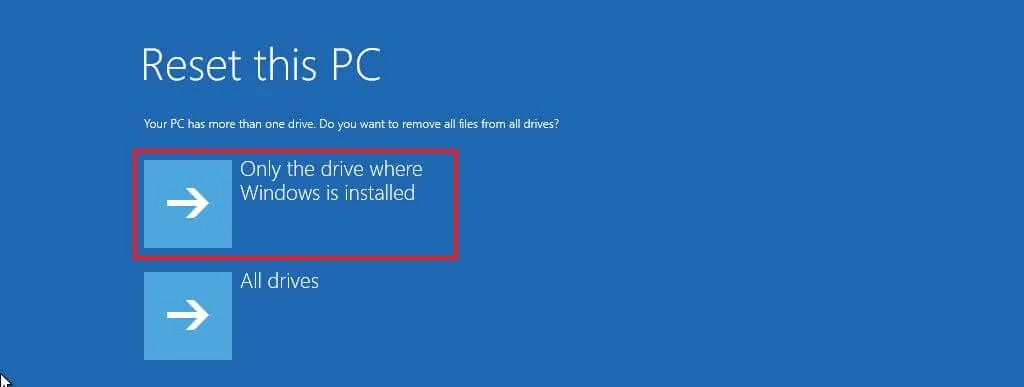
- Select the Only the drive where Windows is installed option to only delete the data of the drive on which the current version of Windows is installed.
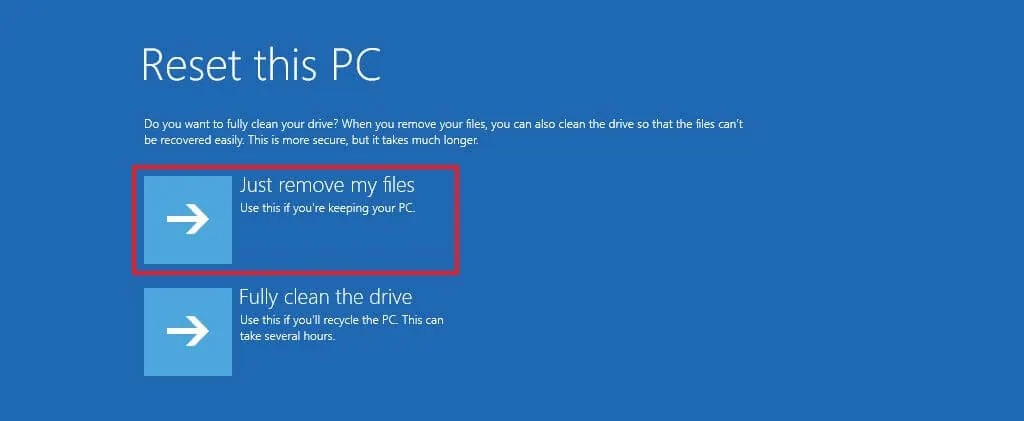
- Click on the Just remove my files option to only clean the files.
- Click on the Reset button to begin the restoration process.
- You need to follow some on-screen instructions that are required to set up Windows 11 on your Windows PC. Once that’s done, you can enjoy the clean installed Windows 11 on your system.
6. Through Windows Media Creation Tool
One of the ways to create a bootable media installation USB drive is the Rufus software. Windows Media Creation tool is another way that lets you create a bootable media drive and clean install Windows 11. Follow the steps correctly to clean install Windows 11 using the Windows Media Creation tool.
- Download the Windows Media Creation tool and install it on your Windows system.
- Open the Windows Media Creation tool and accept the terms and conditions.
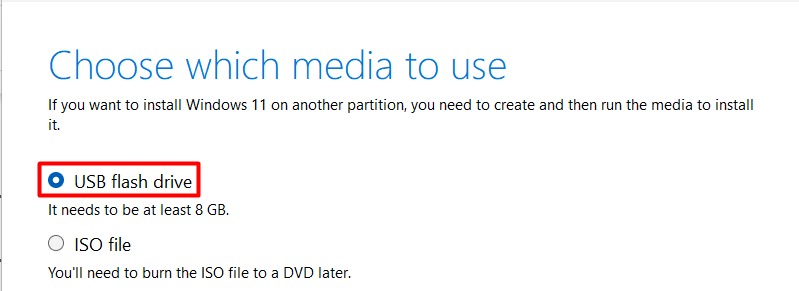
- Click Next and select the USB flash drive option on the Choose which media to use screen.
- Click on Next.
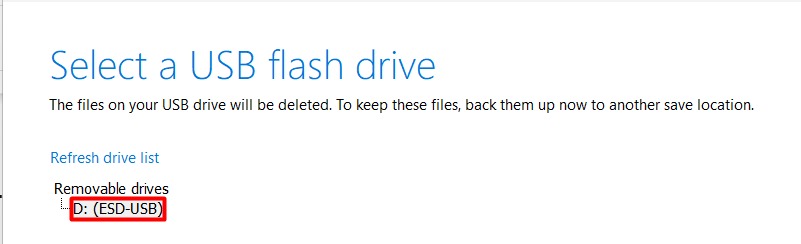
- Select the USB Drive that you want to make bootable. Note: Ensure the selected drive doesn’t have important files, as this process will erase the drive.
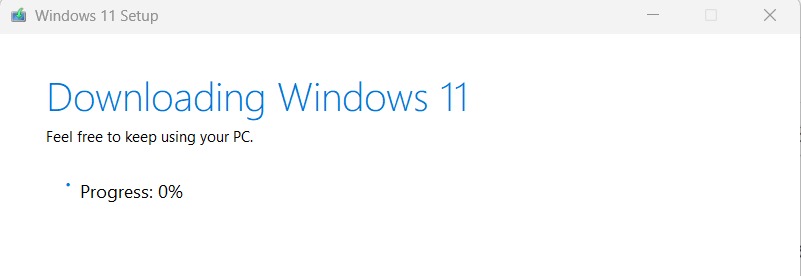
- Windows Media Creation tool will now start downloading Windows 11 on your selected USB drive, then take a few more minutes to verify the download and make your USB drive bootable.
- Open the File Explorer and select your bootable USB Flash Drive from the left sidebar.
- Double-click on the Setup.exe file.
- Again, head to Method 1 of this article and perform the same steps (from step 7 to step 16) with the Setup.exe file. Voila! Once you have followed all the steps correctly and installed Windows 11 on your PC, you can experience it.
Should I Clean Install Windows 11?
Yes, you should clean install Windows 11 if your current Windows system has some errors and performance issues.
Can I Clean Install Windows 11 Without Upgrading?
Yes, you can install Windows 11 without upgrading the PC to Windows 11. In that case, you can use the Windows Media Creation Tool to clean install Windows 11 without upgrading to Windows 11.
Can You Do a Clean Install of Windows 11 Without USB?
Most methods require a USB drive to clean install Windows 11. If you don’t have a USB drive now, you can reset your Windows PC, and it will automatically install Windows 11 if your PC is capable of installing it.
How Do You Do a Clean Install of Windows 11 Without Losing Files?
Open the Settings app and move to the Recovery tab. Click on the Reset PC option under the Reset this PC section. Select Keep my files and then choose the Local reinstall option. Lastly, click on Next and then the Reset option to start the clean install without affecting the system’s data.
How Long Does a Clean Install of Windows 11 Take?
The answer to this question can vary from situation to situation. But, in most cases, it usually takes around twenty to thirty minutes to clean install the new Windows 11.
Final Words
Some users clean install Windows 11 to resolve all the existing issues with their system. At the same time, some users do this to experience the latest Windows 11 with exceptional performance. It can vary in your case, but the process would remain the same. You can follow any of the above-mentioned methods to clean install Windows 11. By the way, do let us know which method you used to clean install Windows 11.