Users fail to do work and utilize the browser to its fullest potential. Sometimes the browser pops an error message such as “Google Chrome has stopped working” and closes. The following guide lists a few potential workarounds to fix Google Chrome and get it up and running again.
Fix Google Chrome Not Opening in Windows 11
Google Chrome not opening on Windows 11 can happen due to corrupted browser extensions, add-ons, and user profiles. Unfortunately, not all errors are easily fixable. They require unique troubleshooting methods. So, we have compiled a list of solutions to fix Google Chrome not working on Windows 11.
1. Restart Your Computer
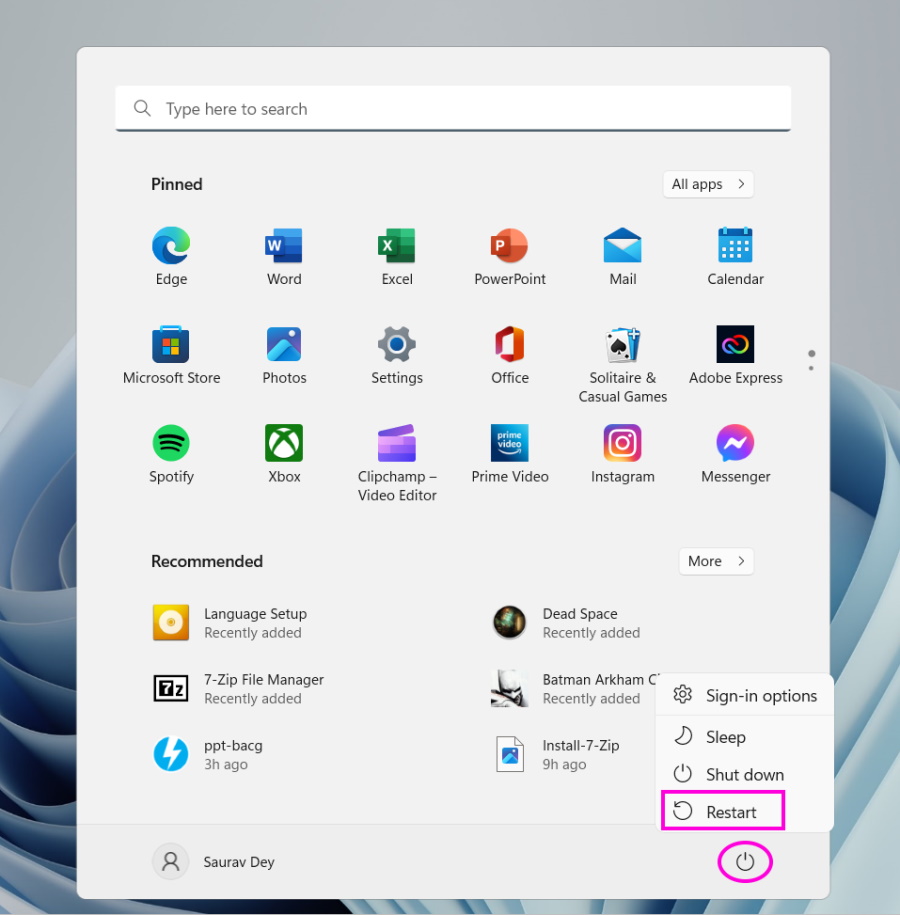
Don’t jump to any conclusion unnecessarily, and keep things simple. So, restart your computer before assuming your Google Chrome has stopped working for a complicated reason, and you need an equally complex solution to fix it. Most of the time, it is just a simple OS or a software bug that caused Chrome not to respond or act erratically. Restarting the computer will fix that. Open the Start Menu, click the Power button and choose the Restart option. Try using Chrome after rebooting the computer.
2. Close All Chrome Processes
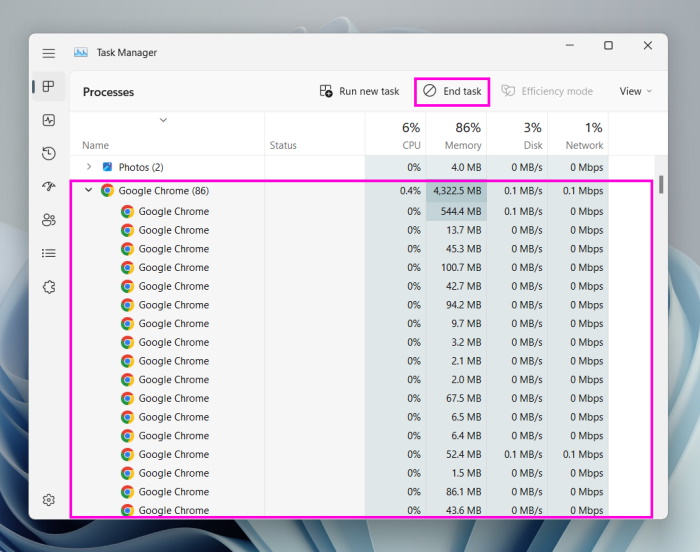
If Google Chrome is continuously crashing on your Windows 11 PC and you can’t open the browser even for a moment, closing all Chrome processes is the best option. It is an easy process, and you can do it from Windows Task Manager. Just follow the steps below.
- Open Windows Task Manager. You can do it by pressing Ctrl + Shift + Esc or Alt + Ctrl + Del.
- In the Task Manager, select all Chrome processes.
- Hit the End Task button on top. Alternatively, you can right-click and select the End task option from the drop menu. After executing these steps, all Google Chrome processes will stop immediately. Relaunch Chrome, and see if it is working.
3. Update Google Chrome
An outdated Chrome browser can also be the reason behind its frequent crash. The app updates are designed to fix bugs and issues. Sometimes, they also add new features. So, the problems with Google Chrome’s performance can often be fixed by simply updating the browser. Ensure you have the latest Chrome update installed on Windows 11 OS to prevent compatibility issues.
- If Chrome partially works on Windows 11, click the three-dot Icon on the top right of the browser.
- Click Help and select the About Google Chrome option.
- A new settings page will appear. Click the Refresh button or press F5 to refresh the page. Chrome will start to look for new updates. If a new update is available, click the Update button to update Google Chrome. If Chrome isn’t working at all, visit the lined page to update Google Chrome.
4. Compatibility Troubleshooter
Compatibility often causes problems with launching apps on Windows 11. It is a big issue if you use a lot of different programs for your work. Microsoft Windows 11 has a compatibility troubleshooter that detects and fixes compatibility issues.
- Press Win + I on the keyboard.
- In the Settings window, select Troubleshoot.
- After that, select Other troubleshooters.
- Click the Run button beside the Program Compatibility Troubleshooter.
- Lastly, select Google Chrome in the troubleshooter’s software list.
- After that, click Not Listed if you don’t find the program in the list.
- Press Next to proceed with Chrome troubleshooting.
5. Disable Antivirus
Antivirus utilities can often conflict with applications on Windows 11. If you use third-party antivirus, the chances of conflict are higher, but users have reported the same issue with the Windows Defender.
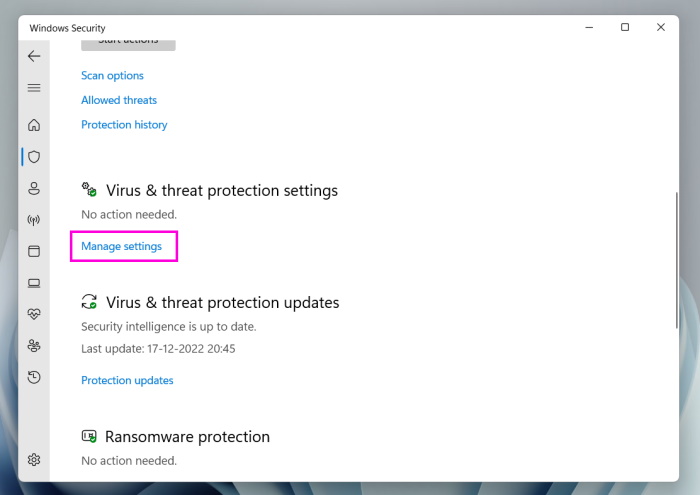
- Double-click the Windows Security System tray icon.
- Click the Virus & threat protection option. It looks like a Shield Icon.
- Navigate to Manage settings.
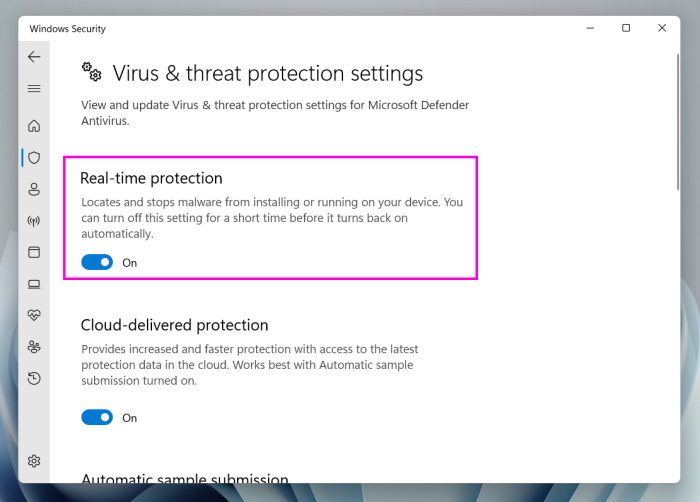
- Turn off Real-time protection. This method is for Windows Defender. If you use a third-party antivirus, right-click the antivirus icon in the system tray. The context menu will pop up. Choose Disable setting, which will deactivate the antivirus shield for a few hours.
6. Launch Chrome without Extensions
The Chrome extensions are great. They are convenient to use and make our job easier. But there are also bad extensions that conflict with the browser’s performance. You may want to remove them. In the meantime, try launching Chrome without the extensions. If Chrome works without the extensions, it is confirmed one or more extensions are causing trouble. Detect and remove them.
- Create a desktop shortcut for Google Chrome. Right-click desktop, New > Shortcut.
- Click Browse in the Create Shortcut window.
- Select Chrome’s location and click OK.
- Edit Chrome’s location with “- -disable-extensions.” Click Next to continue.
- Name the shortcut Chrome without Extensions and click Finish.
- Now, double-click that shortcut to launch Google Chrome without extensions.
- After Google Chrome launches without the extensions, check whether the app is working correctly. If so, you need to delete the most recent extension or the one you suspect is causing the problem.
7. Reset Google Chrome
If Google Chrome is not working on Windows, you also have the option to reset Chrome.
- Open Google Chrome Settings. You have to click the the three-dots icon on the right to access it.
- In the Setting window, click Reset and Clean Up.
- After that, click Restore settings to their original defaults.
- Click Reset settings on the popup. Doing this will restore Google Chrome to its original settings, which might fix the problem with Google Chrome.
8. Delete Chrome User Profile
The Chrome profile may have gone corrupt, and it is causing Google Chrome from functioning properly on Windows 11. So, delete the user profile.
- Press Win + R to launch the RUN dialogue box.
- Type the following command in the dialogue box and hit Enter.
- In the new window, locate the Default Folder. Create a copy of this folder as a backup.
- Delete the Default Folder. If the user profile was the issue, Chrome should work appropriately after deleting it.
9. Flush the DNS
The DNS cache contains information. The information regarding recent website visits and other internet domains. Storing this data locally helps a lot, but it can also get corrupted when inserted by unauthorized domain names or IP addresses. So, you have to delete the existing DNS cache to fix Google Chrome. The steps are detailed below.
- Press the Win + X keys on the keyboard.
- Choose Windows Terminal (Admin) from the menu.
- Type the following command in the Terminal window and hit Enter. Wait for the process to complete. Afterward, you will receive a message; “Successfully flushed the DNS Resolver Cache.”
10. Reset Network Settings
If the problem persists even after flushing the DNS cache and you cannot find a way out, try resetting the network settings on Windows 11. Doing this will reinstall all network adapters on the computer, and other network settings will revert to their default value.
- Press Win + I to open Windows Settings.
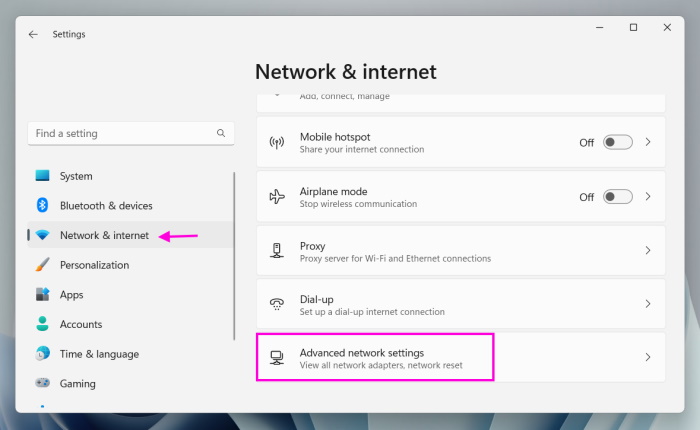
- Navigate to Network & internet tab on the left.
- Select Advanced network settings.
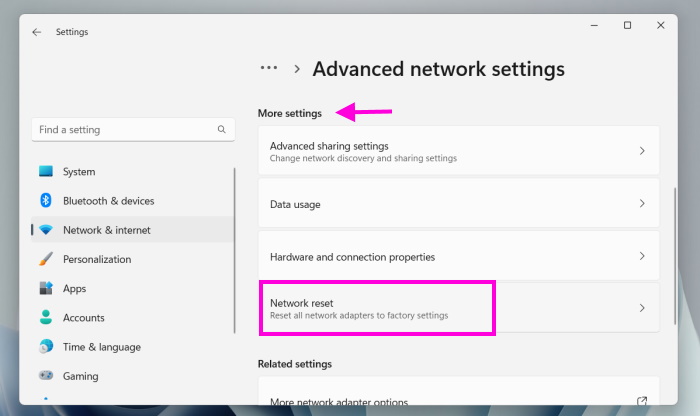
- Choose the Network reset option under More settings.
- Finally, click the Reset now button. After executing these steps, network settings will reset on your Windows 11 computer, and adapters will reinstall. Try using Google Chrome again; there shouldn’t be any problems.
11. Reinstall Google Chrome
Ultimately, you may have to reinstall Google Chrome if none of the fixes are working. This way, you can eliminate the issue entirely and get a fresh start. Additionally, you will also get the latest version of Chrome. Before removing Chrome, ensure all your essential data is synced with your Google account.
- Press Win + I to open Windows Settings.
- Click the Apps tab on the left side of the window.
- Choose Installed apps on the right and scroll down.
- Locate Google Chrome and click the three-dots icon beside it.
- Select Uninstall. Google Chrome will be removed from your computer immediately. Afterward, restart the computer.
- Open Microsoft Edge.
- Navigate to Google Chrome’s Download Page.
- Click the Download Chrome button. The setup file will be downloaded to your computer. Double-click it to initiate the Chrome installation on your Windows 11 PC.
Why is Google Chrome laggy on Windows 11?
You may have been using the Chrome browser for too long. The browser stores a lot of cache data and website cookies, which can make the browser sluggish over time. Start clearing cache data frequently.
Why is Google Chrome crashing on my computer?
There could be a lot of reasons behind this issue. Google Chrome is usually compatible with Window OS, but if you are using an outdated version of Chrome, it may crash or present other silly problems. The browser cache and website cookies can also become an issue too. The corrupted cache can make the web browser sluggish and even push it further to crash. The same goes for website cookies.
Is Microsoft Edge better than Google Chrome?
There’s no data to set such precedence. Both Chrome and Edge are good enough web browsers with a set of privacy and security features. But when it comes to navigation, Microsoft Edge takes the trophy. It provides easier control to the users. However, Google Chrome is more consistent with updates, meaning it is safer to use.
Enjoy the Amazing Chrome Browser on Windows 11
There’s no guarantee that you won’t face the same or different issues with Google Chrome in the future. The next Chrome update could make it sluggish, or the next Windows update could cause it to crash frequently. However, the resolutions we have provided are adequate. They will fix numerous potential Chrome browser issues that push most users to switch to a different browser.