1. Ensure AirPods are charged
The first step is to check if your AirPods are charged. There’s no way they will connect to your device if discharged. Plug them into a charger for a couple of hours and check if they’re working now. You can check out our explainer on how to check the battery level on AirPods to learn more.
2. Re-pair AirPods
Now that your AirPods have charged, the next step is to them. Follow the steps below to re-pair your AirPods.
3. Restart the connected device
It is possible that the device connected to AirPods might have an issue. To overcome this, restart your iPhone, iPad, or Mac. However, make sure you’ve put the AirPods back in the case while restarting your device. Check out our explainer on how to restart an iPhone or iPad if you are unaware. Once done, connect AirPods to your device and see if both the AirPods are working!
4. Check for software and firmware updates
Apple is acclaimed for its software support for iPhone. However, it does not leave wearables behind. While the AirPods do not receive software updates, they receive firmware updates. Although the firmware is updated automatically on AirPods, you can check our guide on how to update the firmware of your AirPods if it is still showing the older version. Also, if the connected device has a software bug, Apple probably has released a software update that fixes this issue. Make sure you update the software of your iPhone, iPad, or Mac.
5. Clean AirPods
If the speaker grille of your AirPods is clotted with dirt, it might be muting the audio. It is a possibility, and the only way around it is to clean your AirPods. You do not need any high-end equipment to carry out the cleaning procedure. A simple AirPods cleaning kit would do the job. If you’re afraid to go about it, you can rely on our guide to clean AirPods for directions.
6. Hard reset AirPods
It is sometimes necessary to reset your devices as doing so might reset any bugs caused due to software updates and even clean the cache. And resetting the AirPods is not even a difficult task. Follow the steps below to reset your AirPods.
7. Reset Network Settings
There may be some issue with your network settings causing repeated disconnection with AirPods or not letting the AirPods connect to your iPhone. Follow the steps listed below to learn how to reset these network settings on your iPhone.
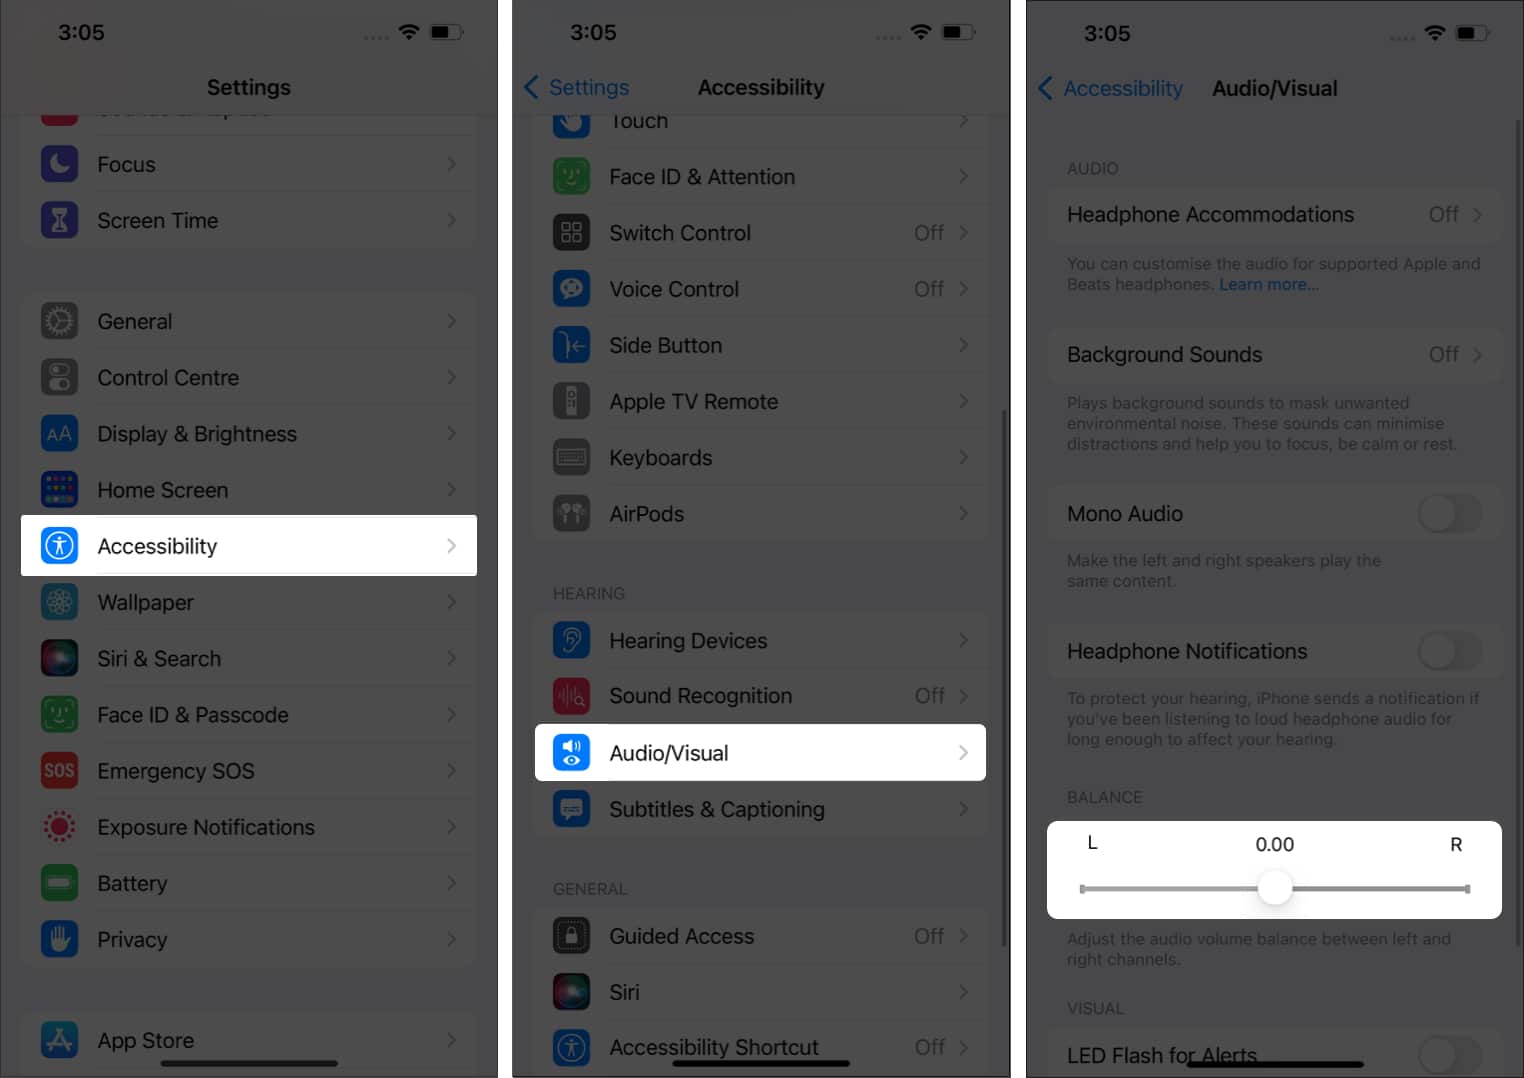
8. Balance Stereo Settings
Some might not even be aware of the balanced setting under Audio/visual, but it might be why one of your AirPods has no audio output. Follow the steps below, and this setting might resolve your issue.
9. Battery issues
As I already mentioned, AirPods have their flaws, and one such flaw is longevity. AirPods have tiny batteries, and users constantly charge (and drain) these batteries. This deteriorates battery health. That’s why your AirPods don’t last as long on a single charge as they did when you bought them. If your AirPods are not under warranty and the battery is dead and not charging, it’s time to get a new pair of AirPods!
10. Contact Apple Support
If none of the above fixes solved the problem for you, there might be a hardware issue. Hence, if your AirPods are under warranty or if you’ve subscribed to Apple Care+, there is still hope. You need to contact Apple Support, and they will hopefully resolve your issue or replace the AirPods. That’s it! So this is how you can fix the left or right AirPod that’s not working. Let us know if the steps above helped solve your issue. Also, what are your thoughts on TWS and how they changed the wearable audio market? Share in the comments below. Read more:
AirPods not charging? Here’s how to fix this issueAirPods mistakenly getting detected by Find My? 4 Real fixesHow to connect two AirPods to one MacHow to connect AirPods to Chromebook