In case, you don’t want to lose your data, then the best option is to perform an in-place upgrade or repair install Windows 11 using ISO Image. What is a Repair Install or In-Place Upgade? Repair Install or In-Place Upgrade lets you reinstall Windows without deleting your apps, files, and settings. Apart from that, it also fixes various issues and errors like:
When system is unable to update your deviceMicrosoft Store is unable to download apps or the latest updates.When system is crashing mysteriously, become slow or frequently showing BSOD
In-place or repair install has the highest success rate in fixing issues related to Windows 11 without losing data.
Repair Install | In-Place Upgrade Windows 11 using an ISO file
In this blog post, you will learn step-by-step instructions on how to perform repair install or in-place upgrade in Windows 11 using ISO image. But before that, you require the following things:
Need ISO Image of Windows 11. You can learn how to get Windows 11 ISO Image.Take a backup of your files.If you have done any custmization, like custom icons and fonts, then it will be removed.
Process To Perform In-Place Upgrade
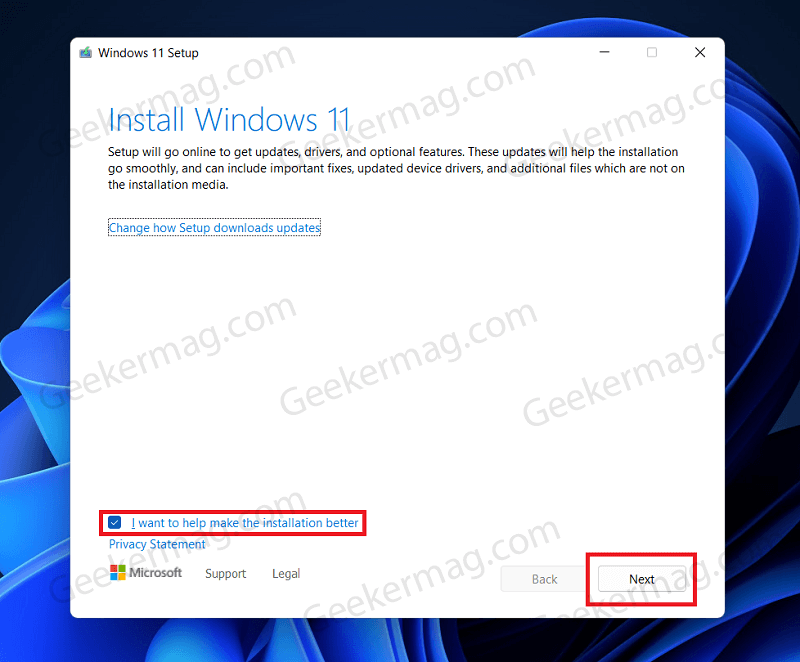
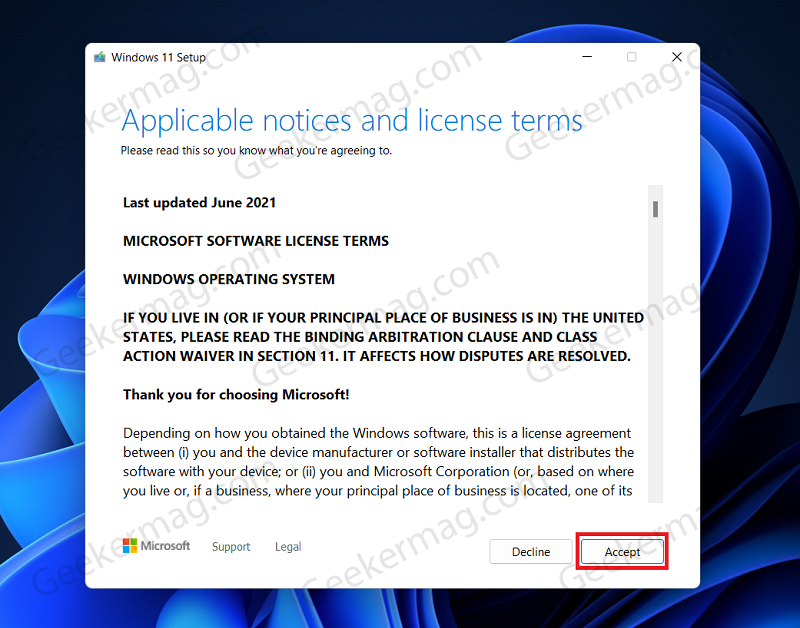
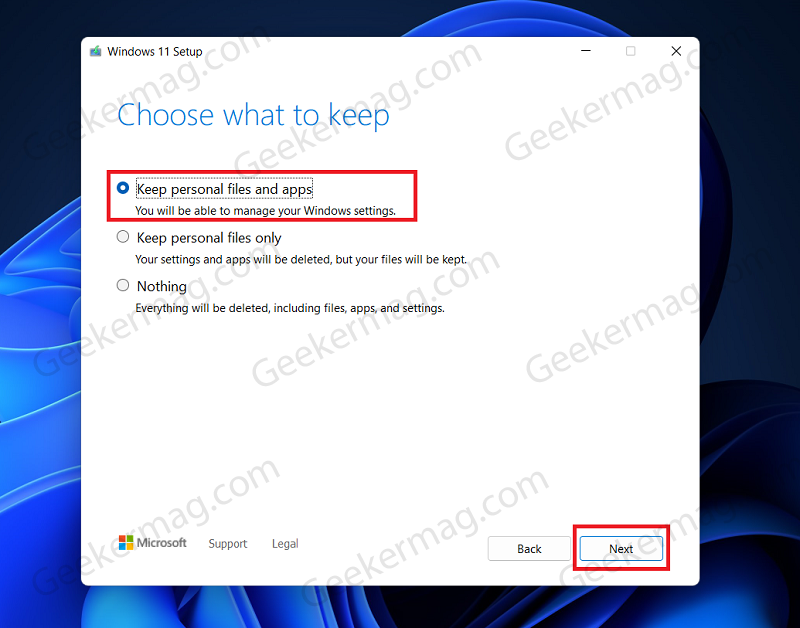
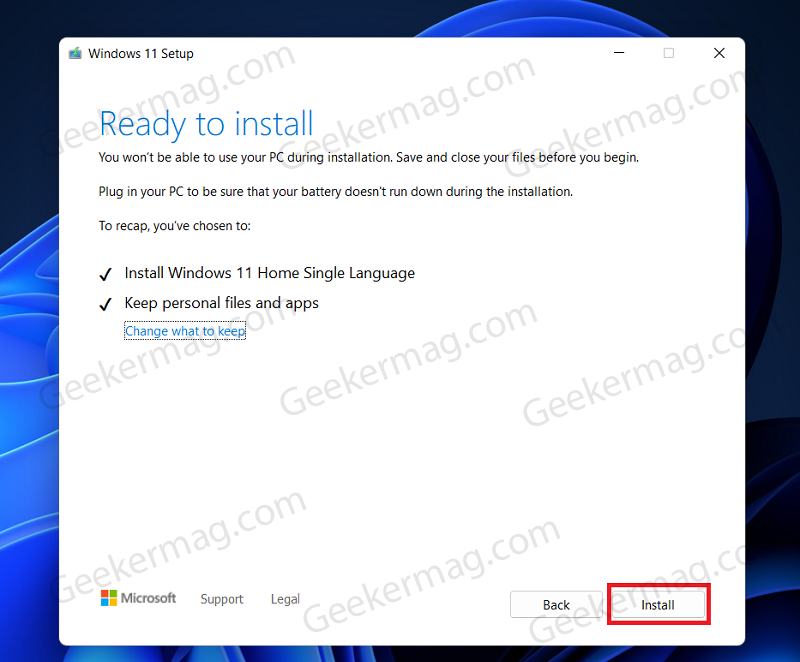
Double-click on the Windows 11 ISO image to mount it Now select the Setup file in the bootable drive, and execute the setup. You can do so by double-clicking on the setup. Windows 11 setup will now run on your PC. It will take some time to initialize. The first window you see will be about making your installation better. Check the checkbox stating I want to help make the installation better and then click on Next. Now the Windows 11 setup will begin checking for updates. This may take some time. Next, you will Applicable notices and license terms. Click on Accept to continue ahead with it. Now, on the next window, you will see what will be kept, and what version of Windows will be installed. If you want to change what to keep, then you can simply click on Change what to keep. By default, all the personal files and apps will be selected, which means no changes will be made to files and your apps. However, if you want to keep only your files and not the app, or you want to remove everything, then simply, click on Change what to keep and select the option as per your preference. After selecting the option, click on Next. Now click on Install to start installing Windows 11. The setup will now repair install Windows 11, and none of your files will be deleted. Your PC may restart a few times during the process. After the process is completed, your PC will implement some final touches, and you will be headed to the login screen. Log in with your PIN or password, and you will have successfully perform the in-place upgrade in Windows 11. This is how you can in-place upgrade or repair install Windows 11. In case, if this method also fails to fix the issue, then the last option is to reinstall Windows 11.