How to Make Mouse Cursor Bigger or Smaller on Mac
In macOS 13, Apple has gone all out to make the System Settings appear in sync with the Settings app of iOS and iPadOS. While the redesign appears to be pretty familiar, it has added a bit of confusion due to the readjustment of many features. But bother not as we have covered quick guides about such features including fast user switching, changing default browser, and the ability to erase all content and settings, etc. Now, it’s time to learn how to make the mouse cursor bigger or smaller on macOS.
- First off, launch the System Settings app on your Mac.
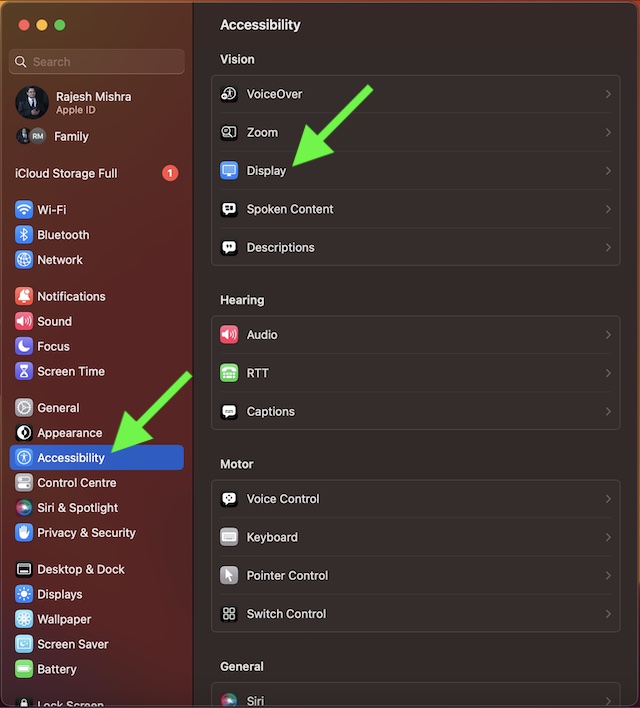
- Scroll down a bit in the Settings menu and choose Accessibility.
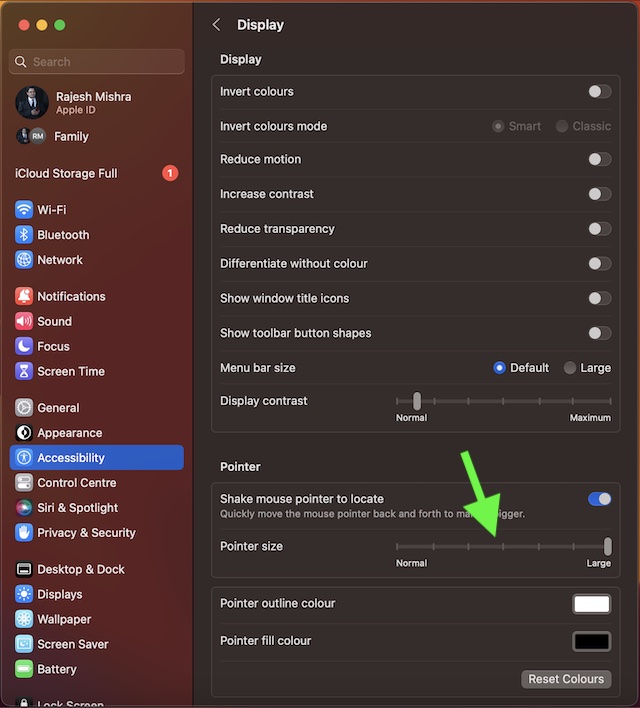
- Click on Display.
- Now, go to the Pointer section and then drag the slider left or right to adjust the appearance of the mouse pointer. If you want to make the mouse pointer look bigger, simply drag the slider all the way to the right. And if you want to decrease its size, just drag the slider toward the left. After you have adjusted the cursor size, quit System Settings. That’s pretty much it!
Final Thoughts…
Normally, I prefer to keep the cursor size small. However, when presenting my thoughts to colleagues or making more interactive guides, I go for the bigger look. The reason why I opt for a more striking appearance is that it is able to catch attention with ease. If you are also in the same ballpark, chances are my usage may find a resemblance with yours. As for the overhauled design of the macOS 13 Ventura, it didn’t have to put a lot of effort to win me over. As someone who has used iOS for several years, the redesign has felt pretty intuitive to me. What about you? Make sure to share your thoughts about it in the comments section below. Read more: How to Enable ‘Type to Siri’ in macOS 13 Ventura on Mac