Apart from that, sideloading apps from third-party sources is also possible. You can check out a detailed guide on how to do that.
When it comes to the Android app, how we can forget Google Play Store, it is the official store for Android apps and hosts a plethora of apps.
If you’re the one who wants to install Google Play Store so that you can access all services and apps on Windows 11 PC that you use on a phone, tablet, and other devices?
Fortunately, well-known developer ADeltaX manages to unlock this possibility. Although, the procedure to install Google Play Store is technical and tricky. In this blog post, we have made the procedure super-easy so that anyone can install it.
How to Install Google Play Store in Windows 11#
If you can’t wait to try Google Play Store on Windows 11 PC, then here’s how you can do that:
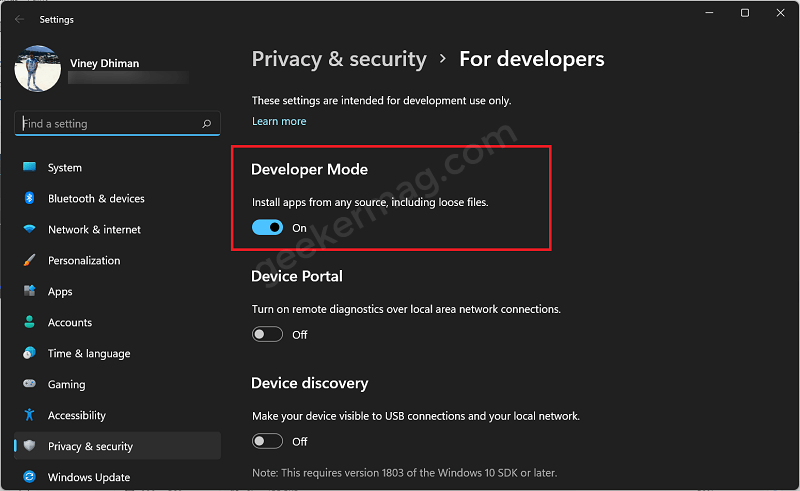
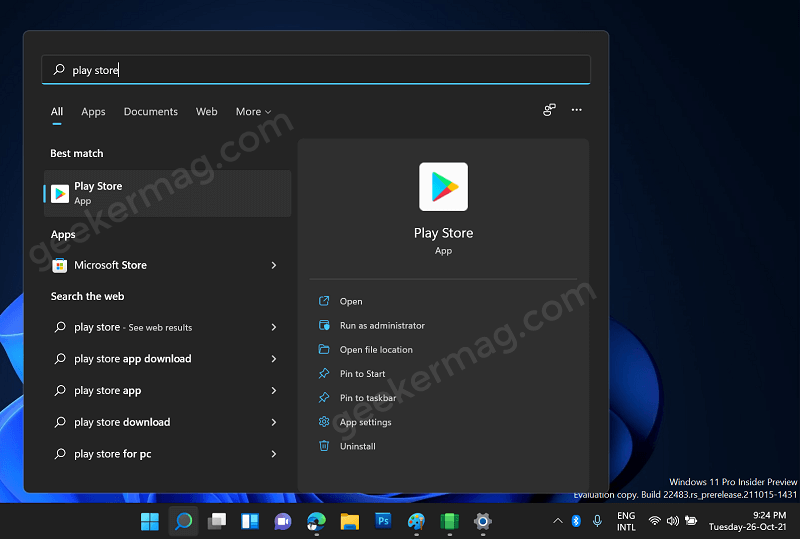
Enable Developers settings in Windows 11. For that, click on the Search icon on the Taskbar and type Developers settings, when it appears in results, click to open it.
Here, make sure that the Developer Mode option is ON. If not, turn it ON. When a confirmation dialog box appears, click Yes to continue.
If you’re already using any version of Windows Subsystem for Android, then Uninstall.
Next, you need to install the latest version of the Windows Subsystem for Android. Use this link to download.
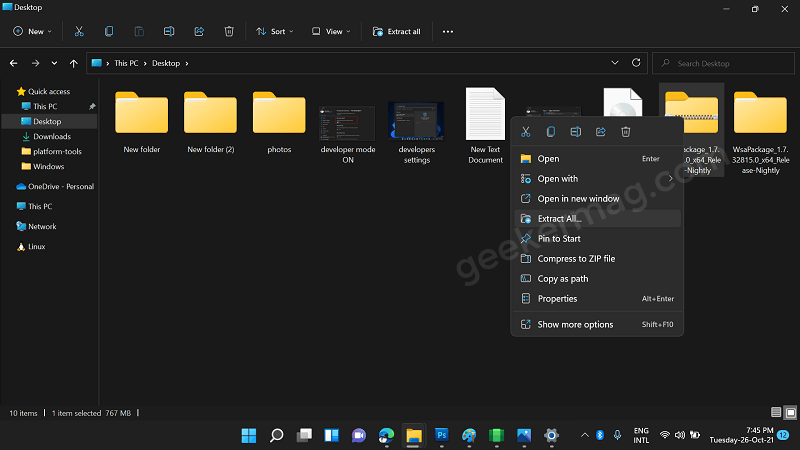
After that, extract the package WSA package to the folder.
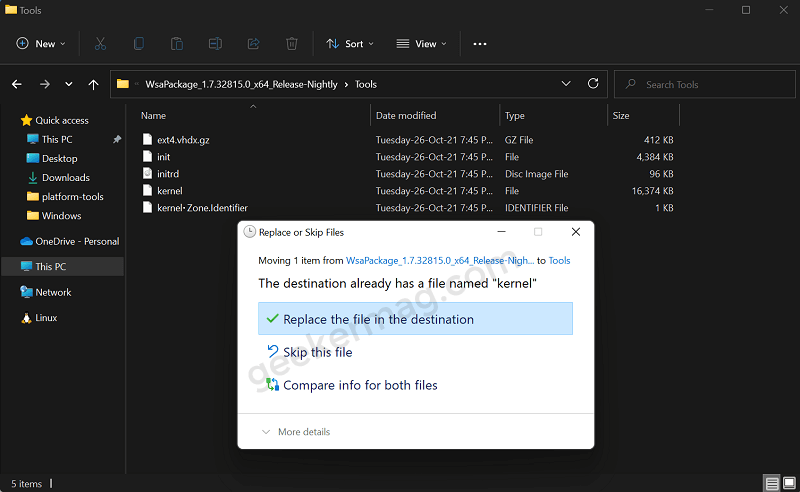
Next, download the kernel file using this link.
Important step – You need to copy the Kernal file to the Tools folder available insider the WSA package folder. This will replace the default kernel file with one of yours.
Select “Replace the file in the destination in the folder” when the dialog box appears.
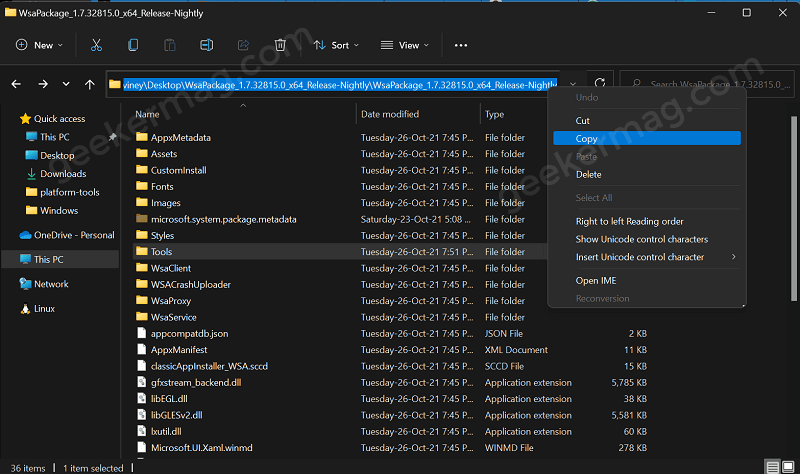
At this point, you have created a modified WSA folder.
Run Elevated Windows Powershell in Windows 11. For that, search the Windows Powershell and when it appears in results, click Run as administrator.
If the UAC dialog box appears, click Yes to continue.
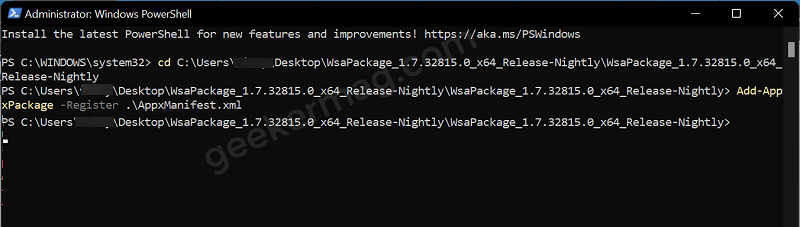
Copy the WSA Extracted folder location.
In the command prompt window, type cd . So the final command will be cd C:\Users\yourusername\Desktop\WsaPackage_1.7.32815.0_x64_Release-Nightly\WsaPackage_1.7.32815.0_x64_Release-Nightly and hit enter.
Make sure to replace ‘yourusername‘ with one of your devices.
After that, you need to copy-paste this command: Add-AppxPackage -Register .\AppxManifest.xmland hit enter.
This will start the deployment, wait for a few seconds. Once done, head over to the next step.
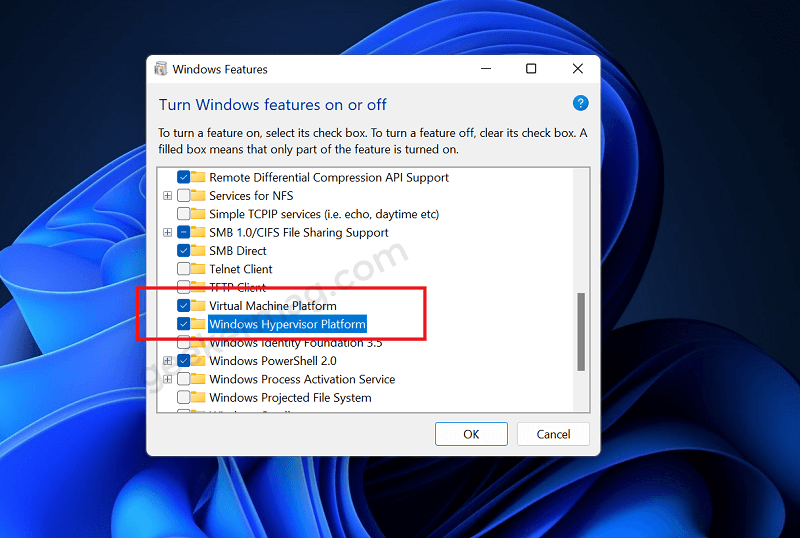
Here, you need to click on the Search icon on Taskbar and type Turn Windows feature ON or OFF, when it appears in results, click to open it.
Here, check the box for Virtual Machine Platform and Virtual Hypervision platform and then click OK.
Now reboot your computer.
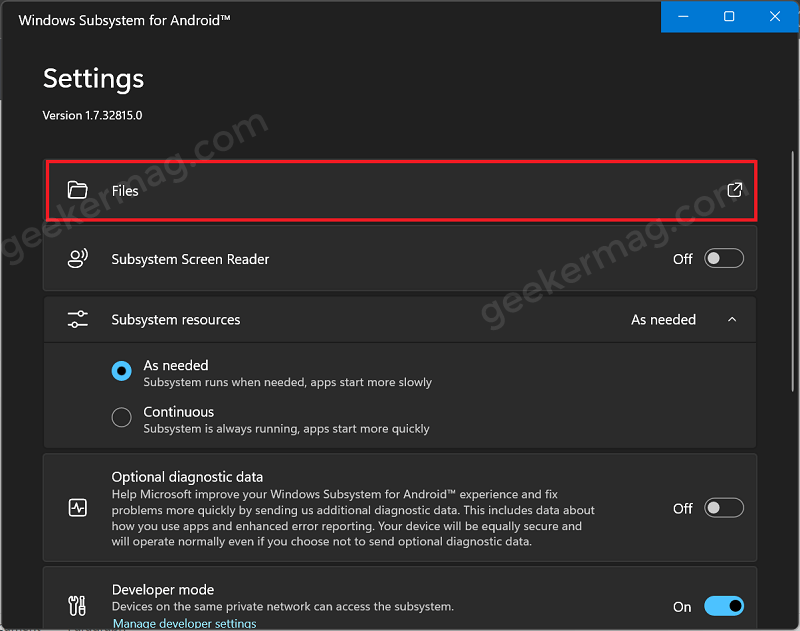
Open Windows Subsystem for Android on your computer.
From the various settings, you need to turn ON Developers mode.
After that, open the File options from the WSA app.
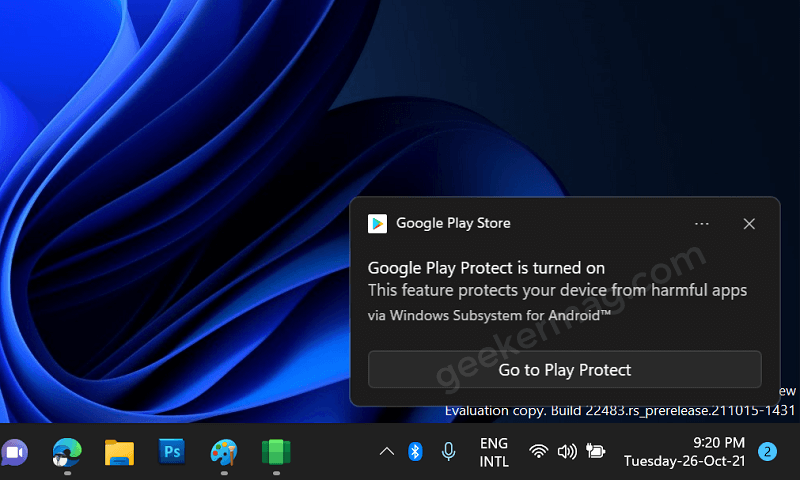
Wait for a few seconds, and you will get a notification that Google Protect is working and loading all the components required for proper function. Let them run in the background. Once done, you will get the notification that Google Protect is ON.
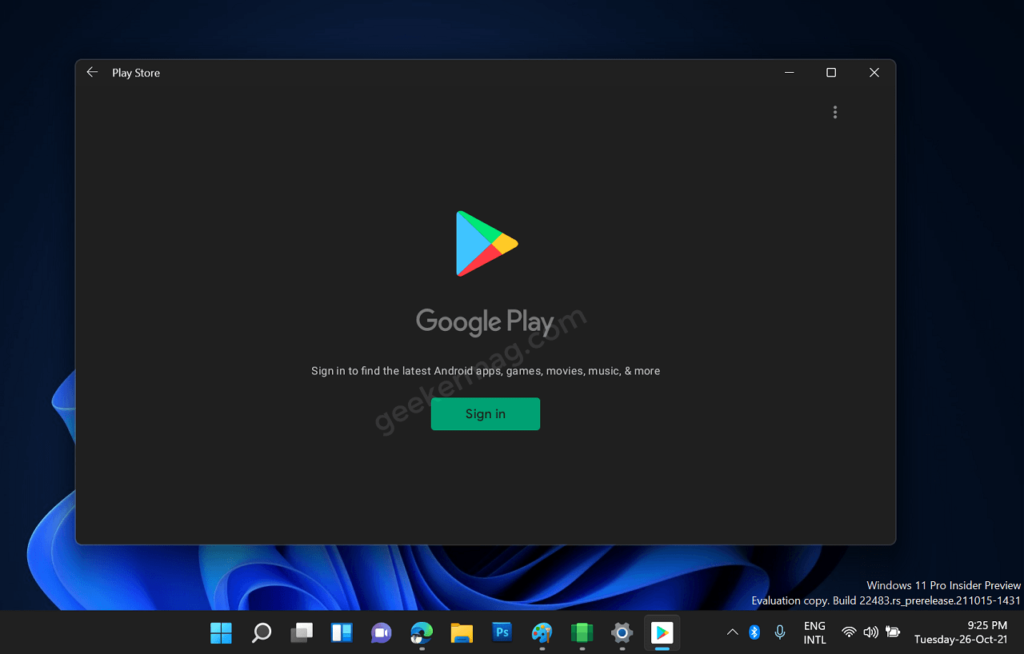
At this point, Google Play Store is installed on your device and you can launch it from the Start menu recommended section or search the app and open it.
You can login using your Google credentials and start using the Play Store to install Android apps on Windows 11.
Important, if you notice that you’re unable to Sign in to Google Play Store, then try the following workaround:
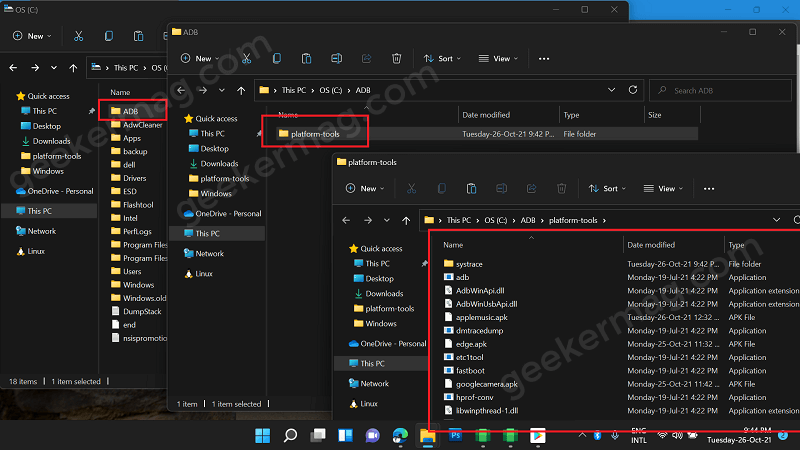
Download Android SDK Platform-tools from Google’s website.
Extract the Android SDK Platform-tools zip file in the folder of your choice.
I suggest you create folder name ADB inside C: and paste all platform-tools folder containing all the files and folders into it. So its location becomes:c:\ADB\platform-tools
For a clear idea, check the following screenshot:
In the Platform-tools folder, type cmd in the address bar and hit enter. This will open Command Prompt window insider Platforms tools folder.
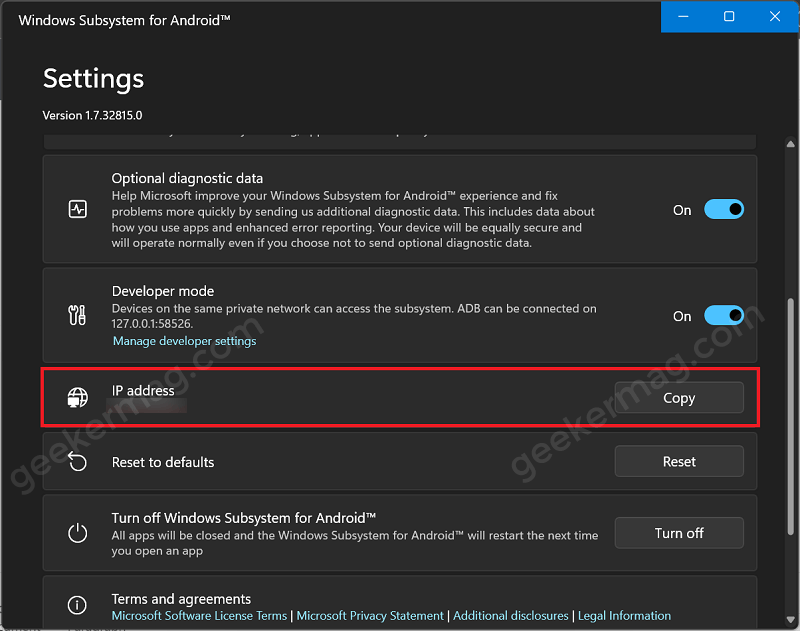
After that, head over to Windows Subsystem for Android and copy the IP address from there.
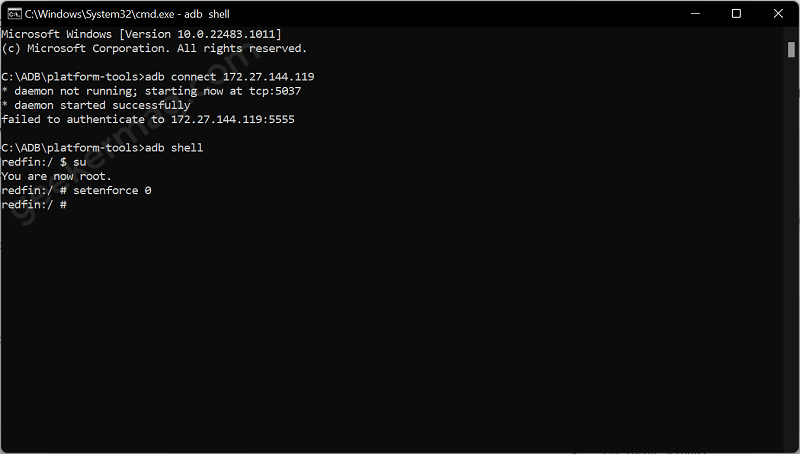
Now following commands: adb connect IP address and hit enter.
Next, type adb shell and hit enter.
type suand hit enter. This will give the message that you’re now Root.
At last type this command: setenforce 0and hit enter.
Now, launch Play Store again and try to log in. This time you should be able to do that.
Now, you can install any app and game of your choice from Google Play Store to Windows 11.
We have tried our best to make this tutorial super easy for you. Why don’t you give it a try and let us know if you find it useful or not? If you have any queries, feel free to ask us in the comment.