In case, you’re one out of those users who have device with unsupported hardware, still you can install Windows 11 on your Windows 10 using a tool called Hyper-V.
FYI, It is a hypervisor feature that comes preinstalled in Windows 10 and allow users to install other operating system using hardware virtualization. For example, Windows 11, Another copy of Windows 10 and other.
How to Install Windows 11 on Windows 10 using Hyper-V
In this article, we are going to share how you can install Windows 11 on Windows 10 using Hyper-V Virtual machine. To make the procedure easily understandable, we have divided the post in three different steps. Lets get started with first method:
Step 1: Enable Hyper-V on Windows 10
Hyper-V feature is disabled out of the box on Windows 10 PC. So if you want to create virtual machine to run Windows 11, then you can enable Hyper-V feature in Windows 10 In case, your device running Windows 11 Home edition, then check out post How to Enable Hyper-V in Windows 11 Home. Note – The links mentioned above has steps for Windows 11, but procedure is same in Windows 10 as well).
Step 2: Setup Hyper-V to Install Windows 11
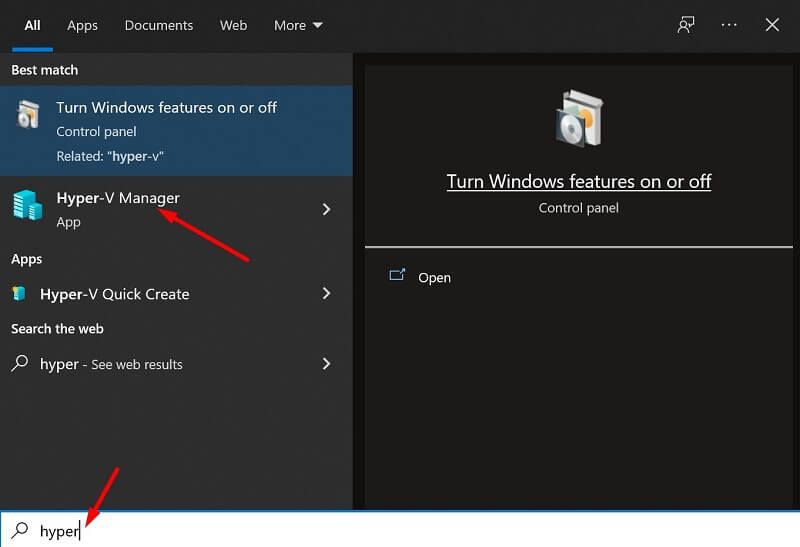
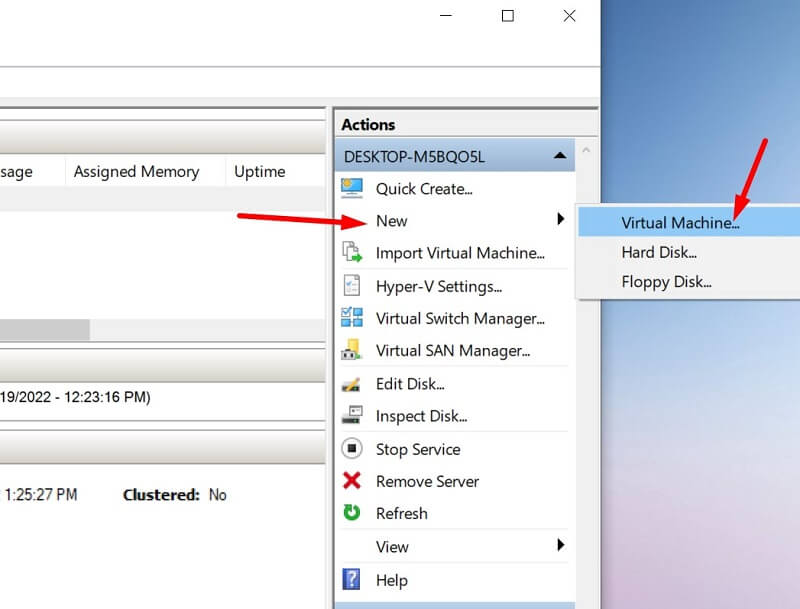
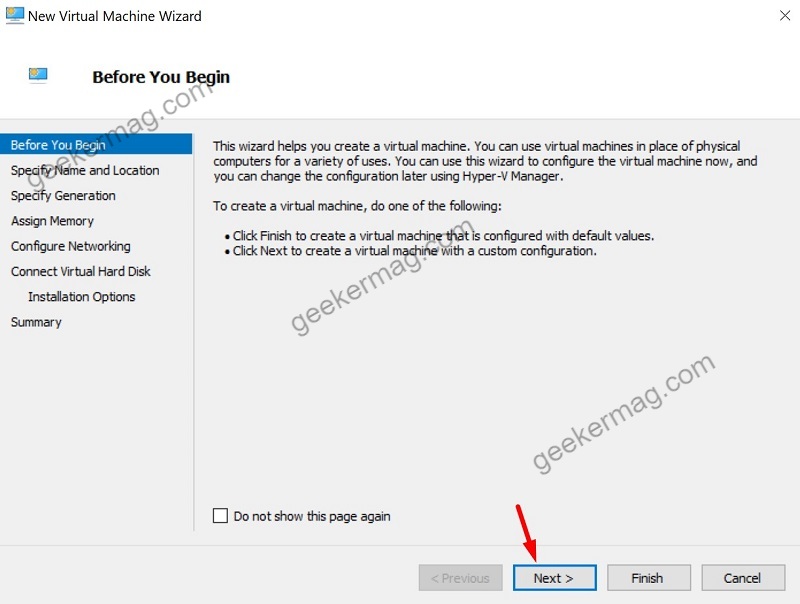
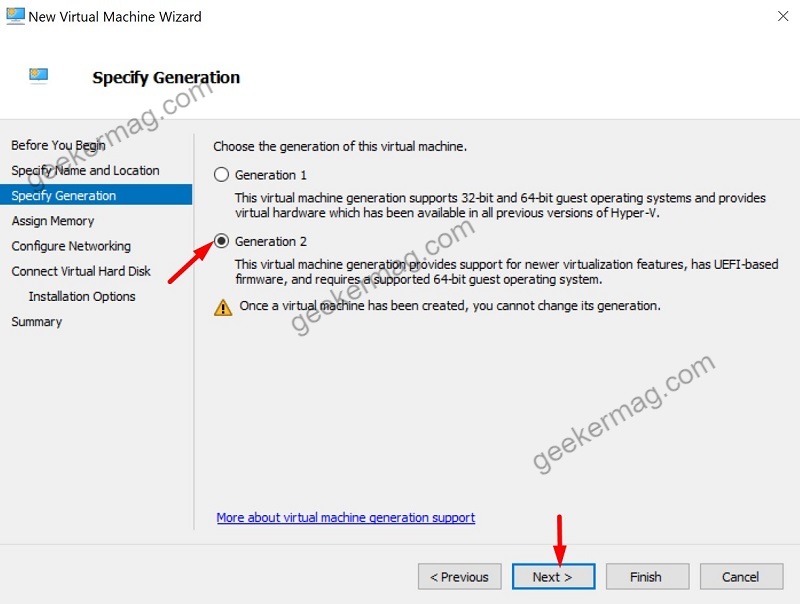
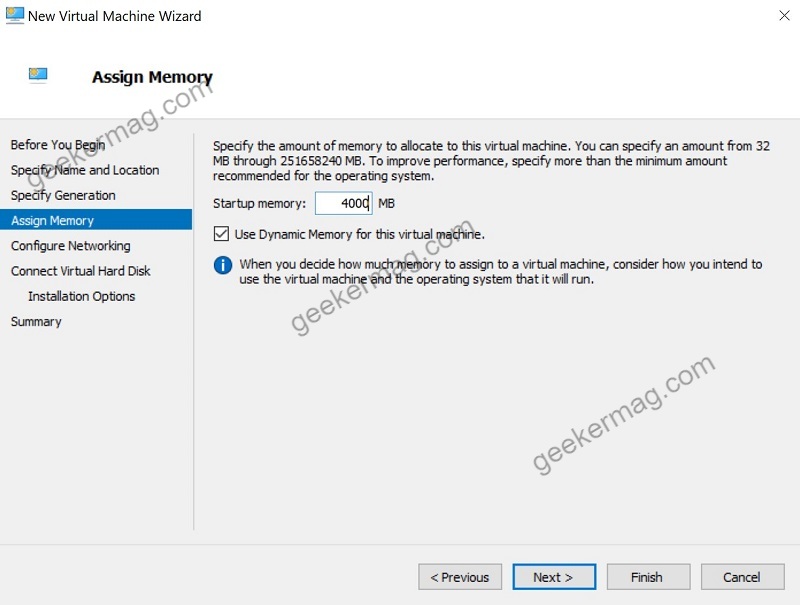
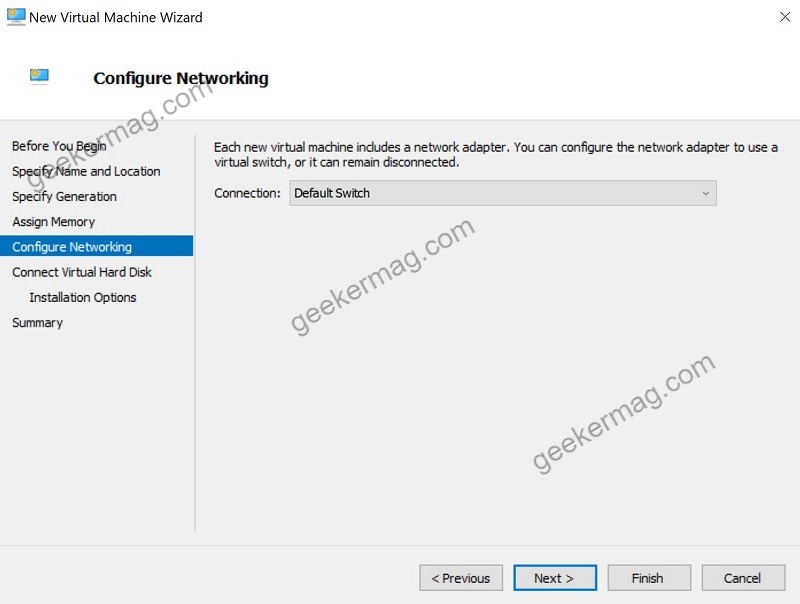
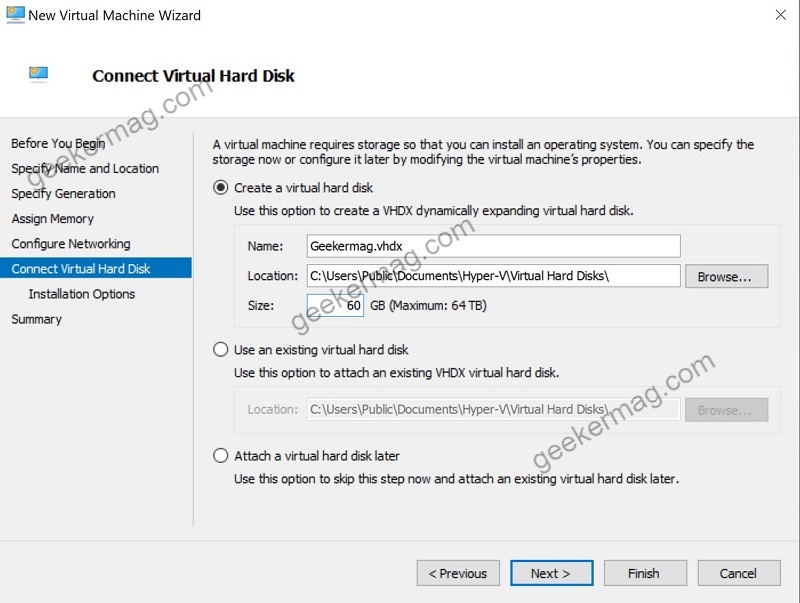
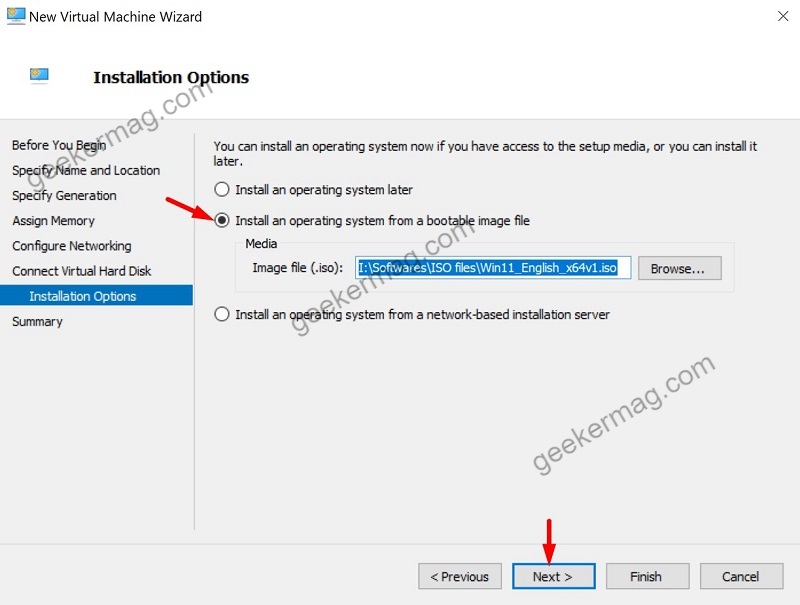
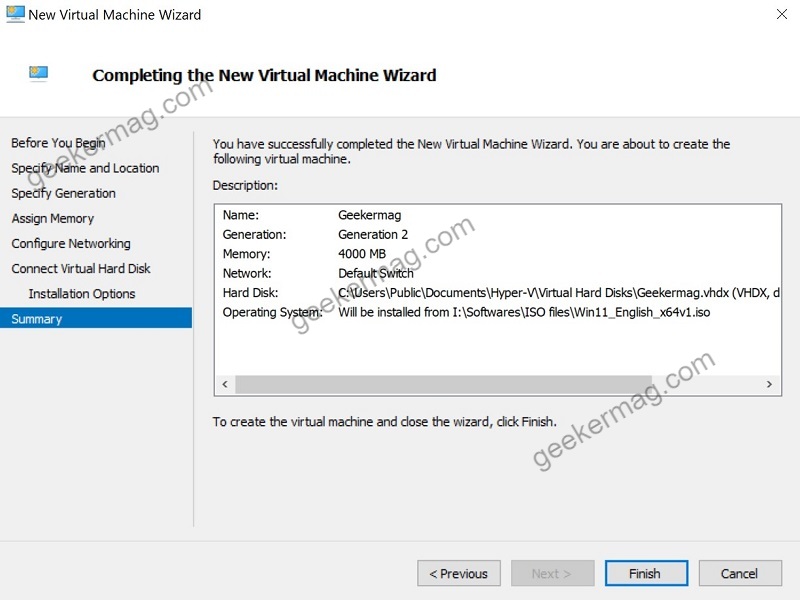
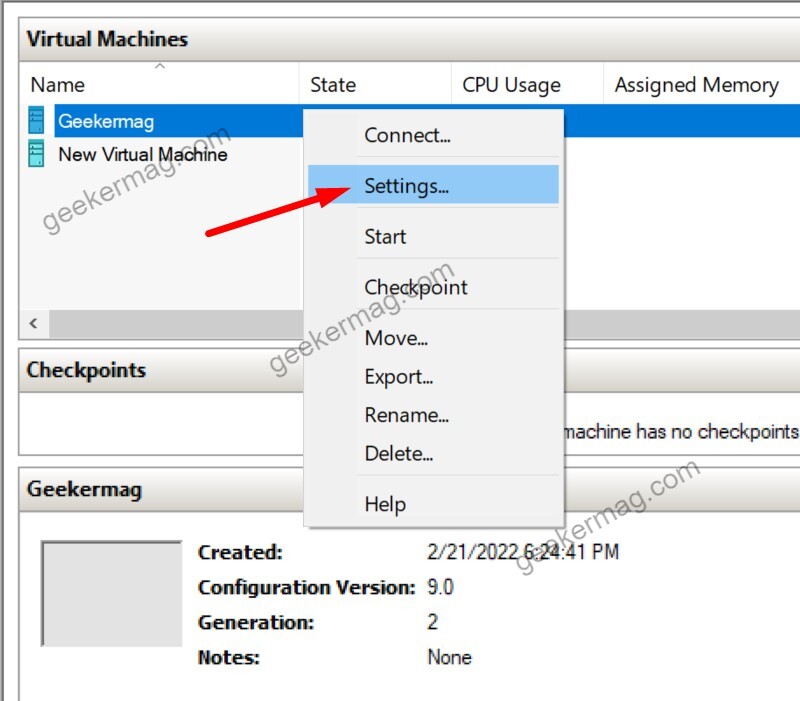
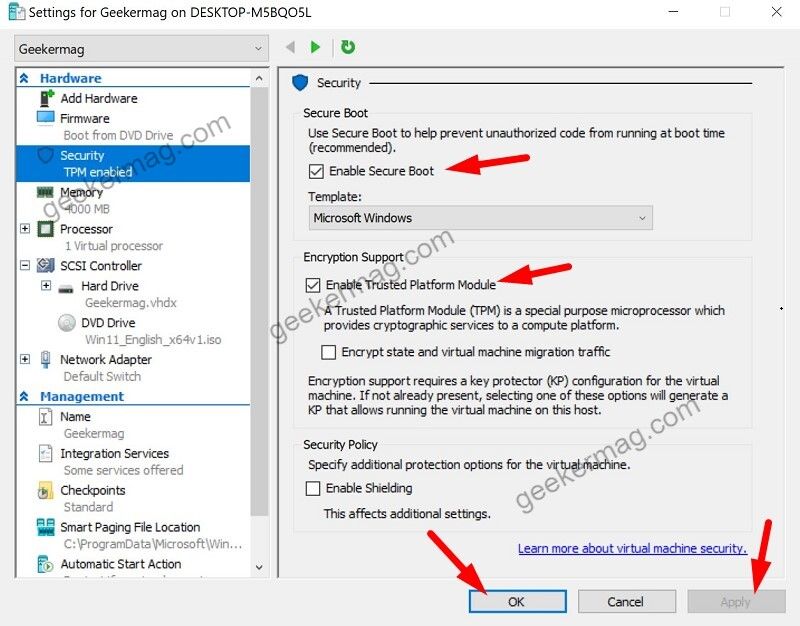
If you have enabled Hyper-V on Windows 10, it’s time to start installing Windows 11. Click on the Windows button to launch start menu and then search for “Hyper-V Manager” and when it appears in search results, click to open it. In the Hyper-V manager, find action and then click on New > Virtual Machine. Click on Next. Enter the name of your Virtual machine. Since, you’re install Windows 11 on virtual machine, then name it Windows 11. For this post, I have mentioned Geekermag. Select Generation 2 and then click Next. Here you have to specify the RAM. Choose a minimum of 4GB of RAM for your Windows 11 VM and then click on Next. For connection, choose Default Switch using the drop-down menu. Select the Hard disk size and virtual machine location to save it on your Windows 10. Keep its size minimum 60GB. Choose “Install operating system from bootable ISO file” and then select your downloaded Windows 11 ISO image file, click Next. Learn, how to download Windows 11 ISO image. Review the virtual machine settings and then click on Finish. Now Hyper-V manager will create a disk for you. Now go to Hyper-V Manager, right-click on the newly created virtual machine, and select Settings. Click on security in the left sidebar. Here you have to enable these two options:
Enable Secure BootEnable Trusted Platform Module
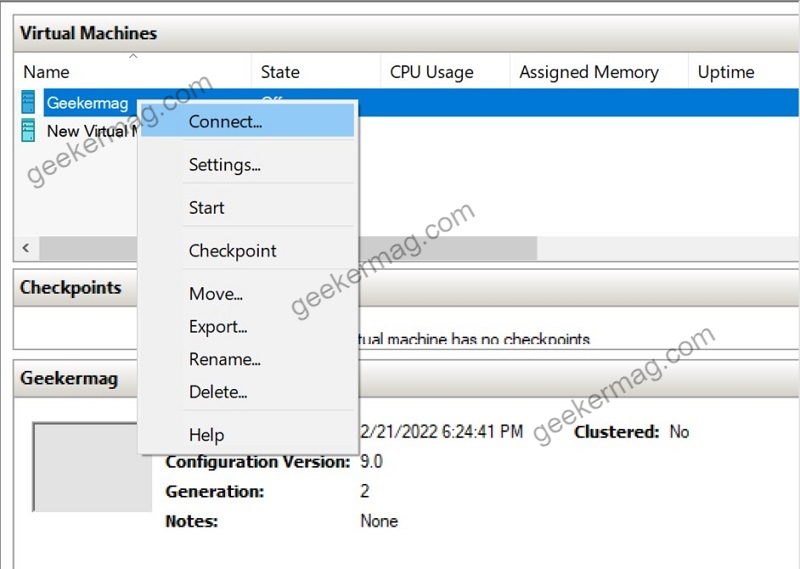
Once done, click on Apply > Ok. Right-click on the Virtual machine you have created and then click Connect to start your virtual machine.
Step 3: Install Windows 11 on Hyper-V
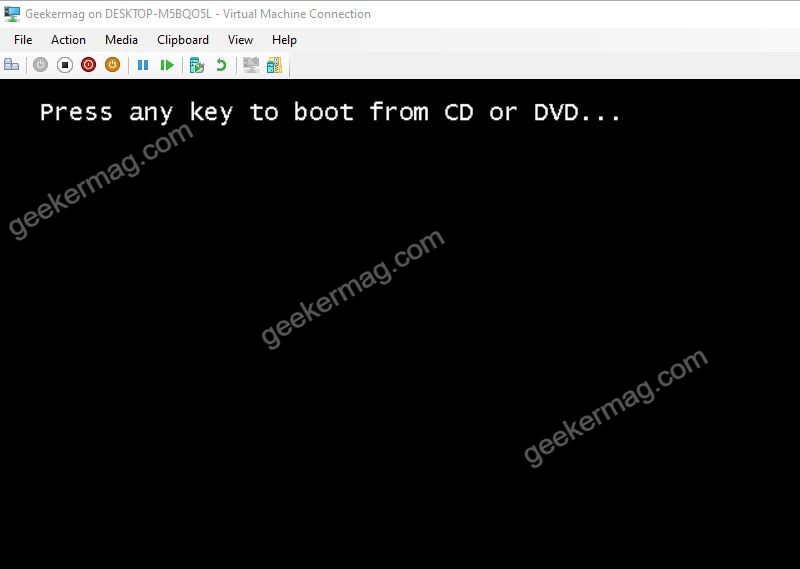
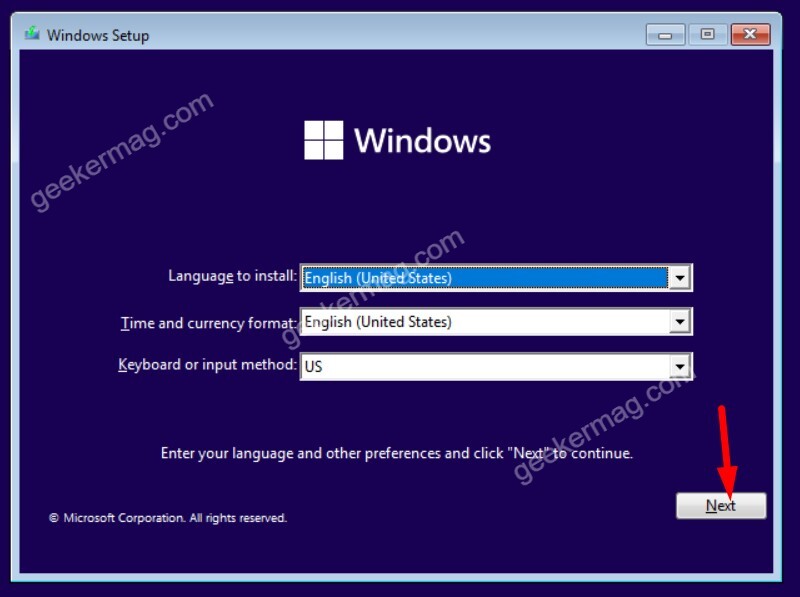
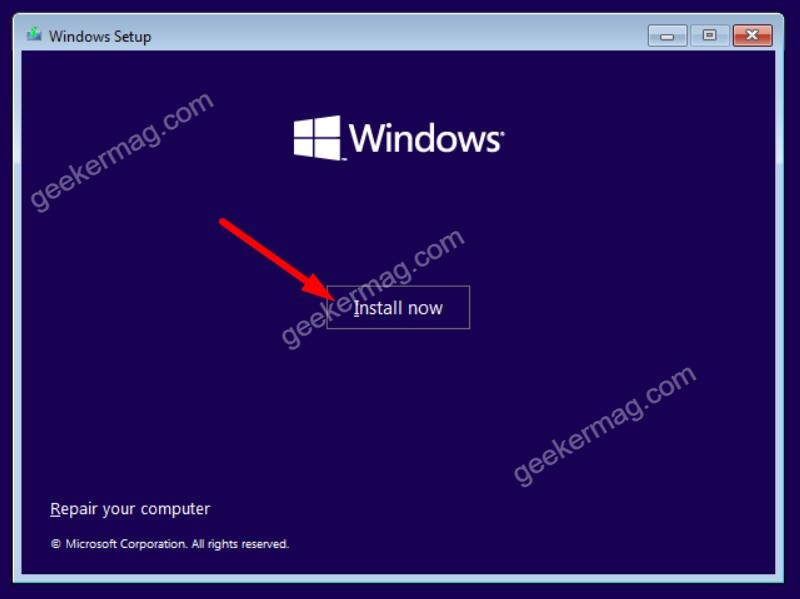
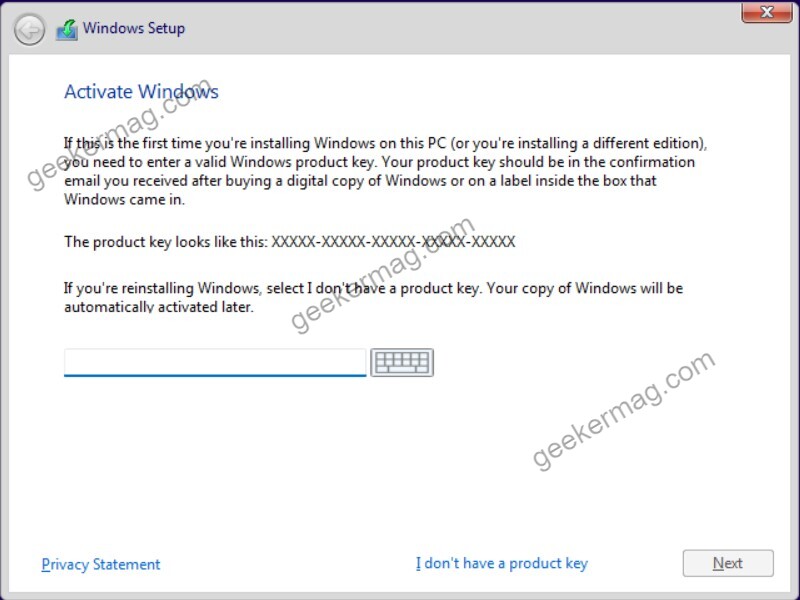
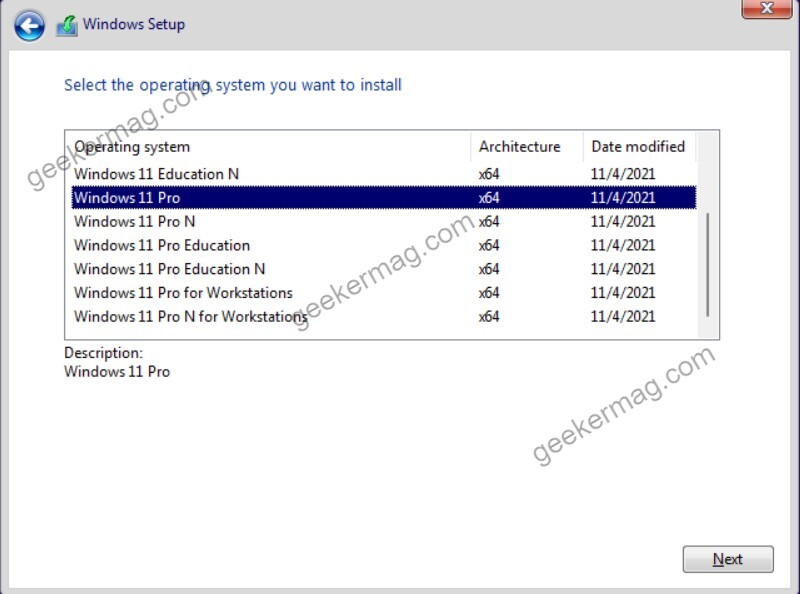
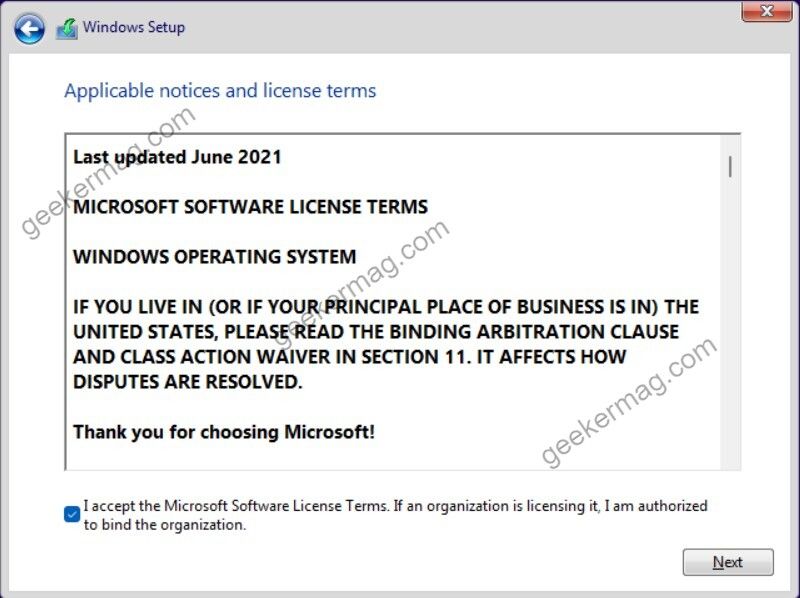
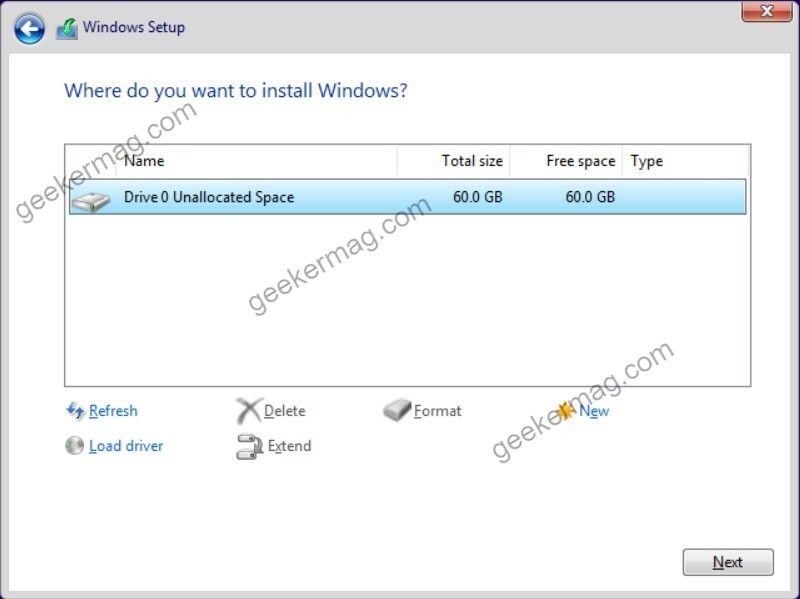
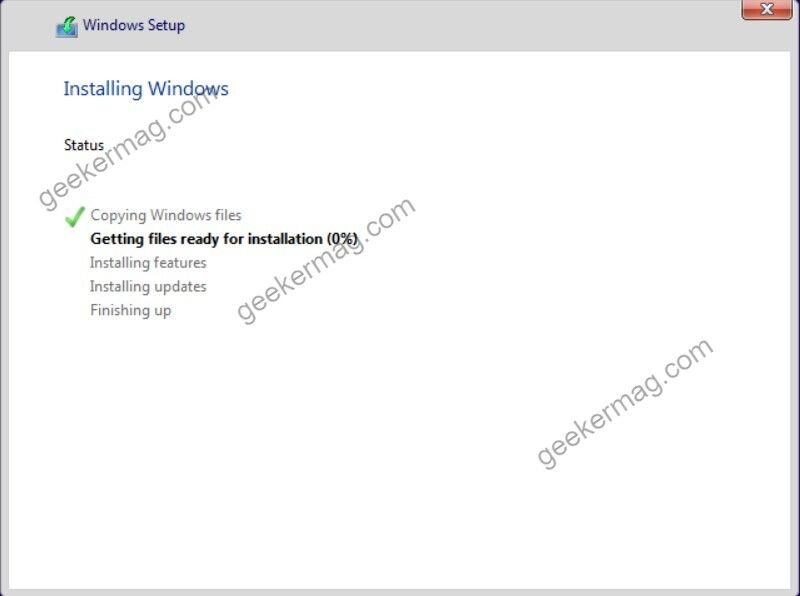
The procedure to install Windows 11 on Virtual Machine is same as you perform a regular installation, but for your convenience we’re sharing steps with you. Here’s what you need to do: When the virtual machine starts, click on the start button. Then you will see the “Press any key to boot” message. Press any key on your keyboard immediately. This will start Windows 11 installation process. Select your Language and click on Next. Then click on Install now. Next, you will be asked for Windows 11 activation key. Enter the key here if you have. If you don’t have the key, click on “I don’t have the key”. Then select Windows 11 version and click on Next. Accept Microsoft Software License Terms. Select custom installation. Select the drive on which you want to install Windows 11 and then Next. It will start installing Windows 11 on a virtual machine. It will take some time. The installation process will start. Wait for some time.
Windows 11 Setup
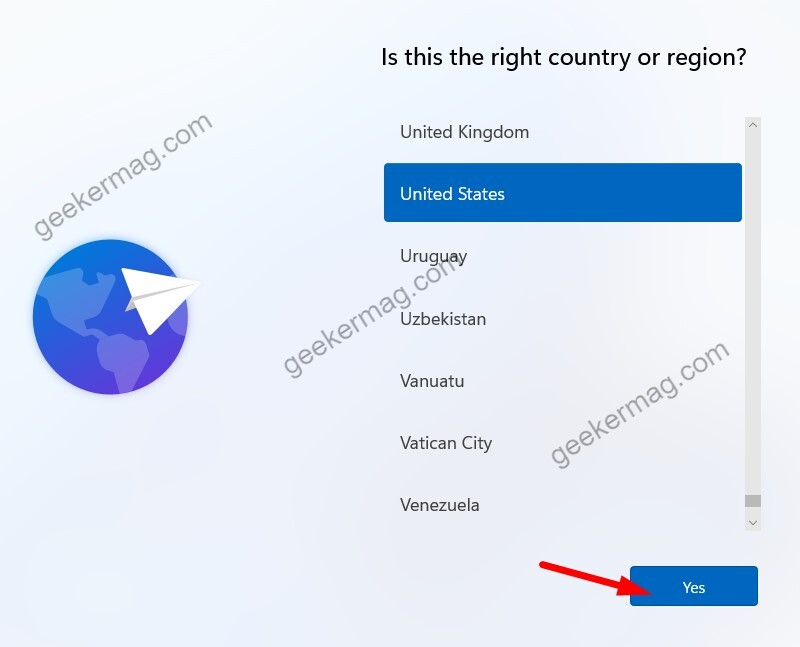
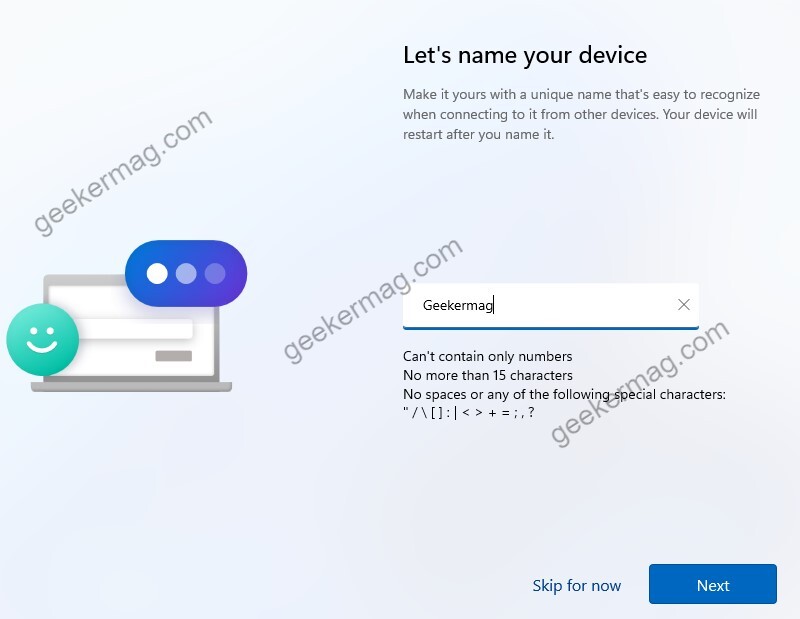
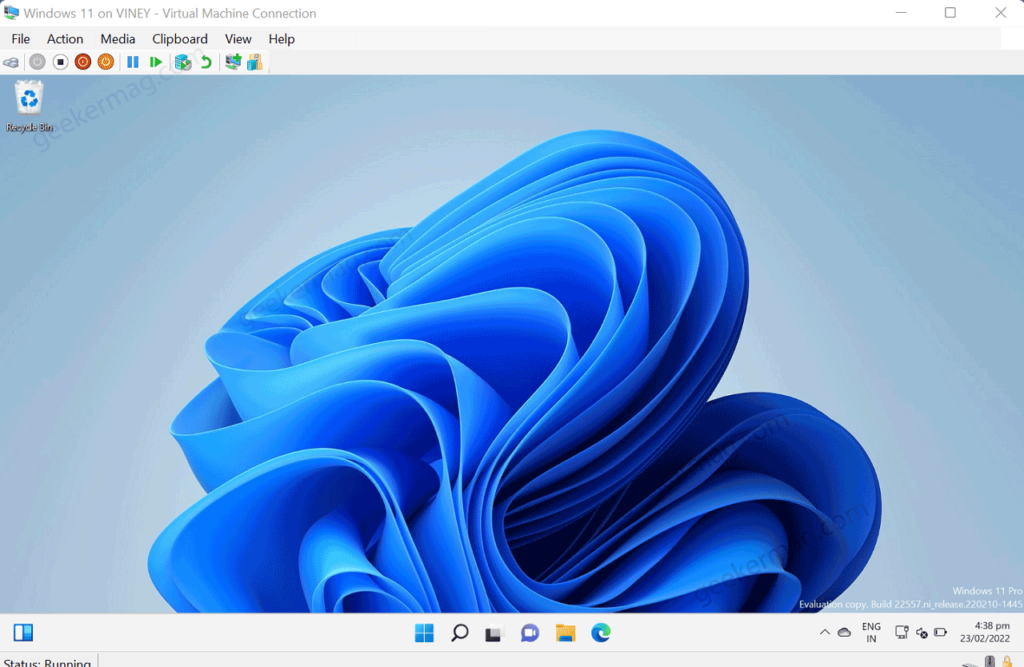
Select your Country or Region and then click Yes to continue Select the keyboard and then click Next. Enter your Computer name and then click on Next. Select set up for personal use and then click Next. Then follow some on-screen instructions to set up Windows 11 and you are good to go. At last, you will reach Windows 11 Homescreen Now your Windows 11 is successfully installed on Windows 10. Enjoy!