Microsoft made lots of changes into Windows 10 in comparison to earlier versions of Windows. With default settings, it hides essential system folders and files from you to restrict you from deleting them automatically, just like in other modern windows operating system. However, lots of time condition comes when you want to view hidden files in Windows 10 directories. For example, in Windows 10 there is a folder called AppData, the folder has lots of app settings files that you want to alter. No doubt there are also some other reasons too due to which users want to learn about how to view hidden files windows 10.
How to Show Hidden Files in Windows 10
The process to view hidden files in Windows 10 is straightforward, but still, there are lots of users who don’t know how to do that. I’m sure you’re one out of them. So to help out users, I decided to write this post in which users will read about two possible ways how to view|show hidden files windows 10. So without further delay why don’t you start reading about them:
1. File Manager (Quick Method)
- Launch File Explorer in Windows 10. For that, Press WIN + E keyboard keys.
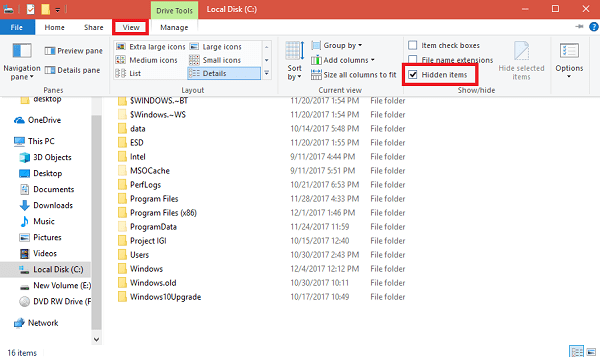
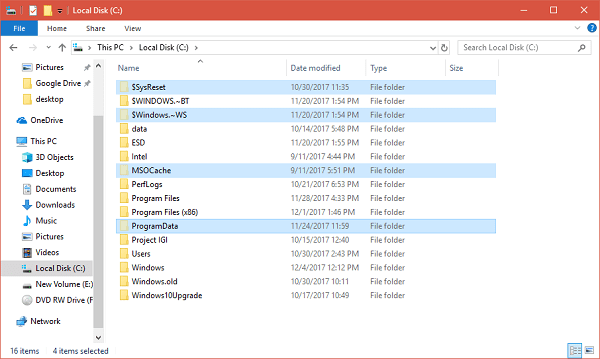
- In the toolbar switch to the View tab and under Show/Hide section tick mark the box for Show hidden files. In no seconds the hidden files and folder will appear in the same directory. For example, by default the C: (Windows installation drive) looks like shown in the following screenshot: But when you select to show hidden files, you will find some extra files and folders (Highlighted) like shown in the following screenshot:
2. Using Settings App
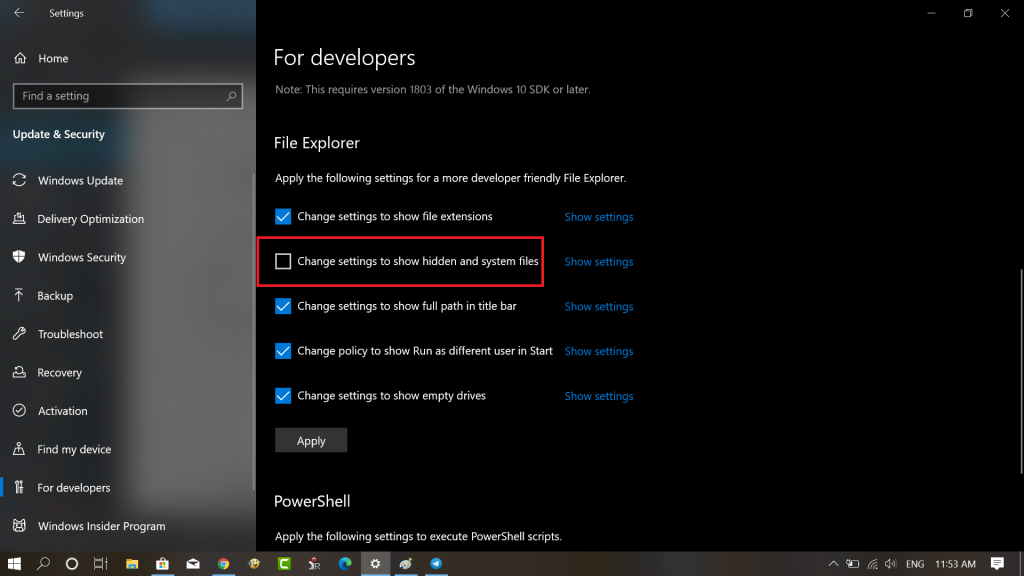
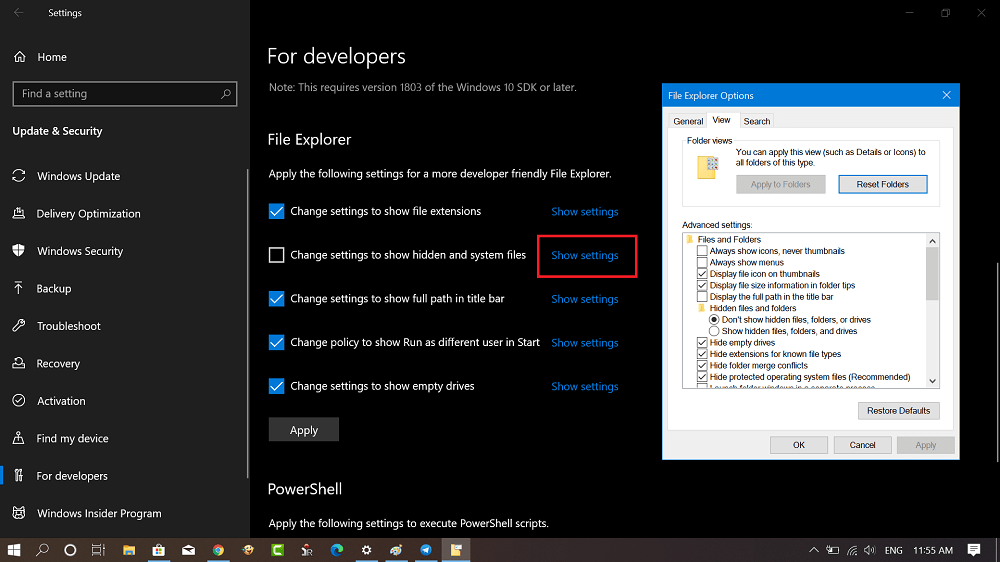
Launch the Settings app and then head over to Update & Security > For Developers (On the left side) On the right side, head over to the ‘File Explorer‘ section and then check the box for “Change settings to Show hidden and system files.“Paragraph In no seconds, all the hidden files and folders will start appearing in the File Explorer. You can also click on Show Settings link to launch the ‘File Explorer Options‘ window. Here, you will find advanced options which you can enable and disable according to your requirements.
3. Using Control Panel
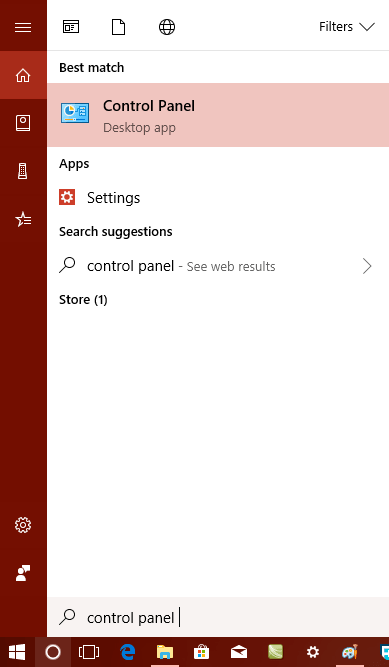
- Launch Control Panel. For that, type control panel in the Windows 10 Start menu and when the same app appears in the search results click to launch it.
- Here in the Control Panel window look for the ‘File Explorer options’ folder and click to open it.
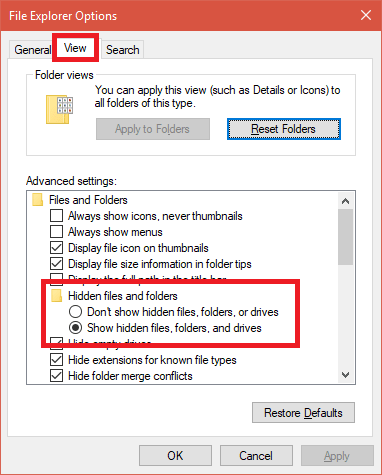
- This will launch File Explorer Options windows; here you need to switch to View tab. Under Advanced settings look for a folder named Hidden files and folders. Under if you will see two options named as:
Don’t show hidden files, folders, or drivesShow hidden files, folders, or drives
To show hidden files in Windows Ten you need to select the option “Show hidden files, folders, or drivers.” After that, click Apply and OK. Now if you head back to the folder, you will notice that all the hidden files and folders are visible. Alternatively, you can also search File Explorer Options in the start menu search bar to open the same window. Here, switch to the View tab for getting the same options. Bonus: The same method also works on an earlier version of Windows like Windows 7, Windows 8 and Windows 8.1. Check YouTube Tutorial: We hope you find this article on How to Show Hidden Files in Windows 10 useful. Let me know your thoughts in the comments.