The internet is powered by a robust technology called DNS a.k.a Domain Name System. It like a phone book for the internet that links web servers with similar site domain names. When you type google.com or bing.com on your web browser DNS is the thing that takes you Google or Bing. So you can imagine how important DNS is for the internet. Most of the users use default DNS servers on their phone that comes out of or you can say provided by ISP. Some of the best DNS alternatives available at the moment are Google Public DNS used by people from years and Cloudflare DNS is a new service gaining the heat swiftly. There are a variety of reasons why people would like to make Android use the DNS server of your choice. Some ISPs record DNS queries and share it with third party services. While some DNS servers are faster than others and help in loading sites quickly depending on how close their servers are.
How to Change DNS Server on Android Phone
In case, you want to set the DNS server of your choice on your Android phone, then the following post is dedicated to you. The process of replacing the default DNS server with open DNS server on your Android phone depends on what version your phone or tablet is running. The process is easy on devices running the latest version of Android and a bit different in the older version. In case, you don’t know what version of Android you’re running on your phone, then you can find it by going to Settings > About.
Android 9 or above
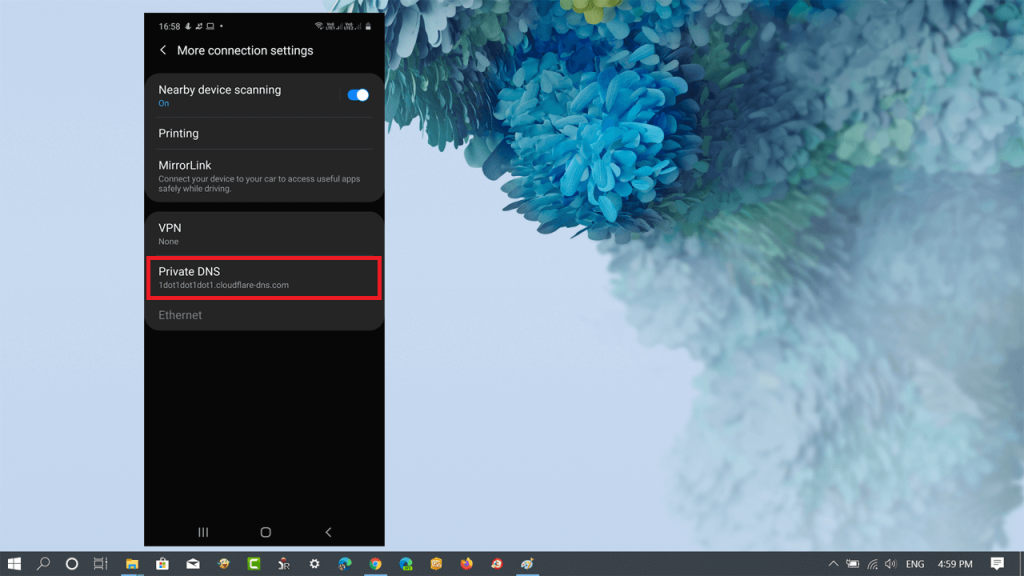
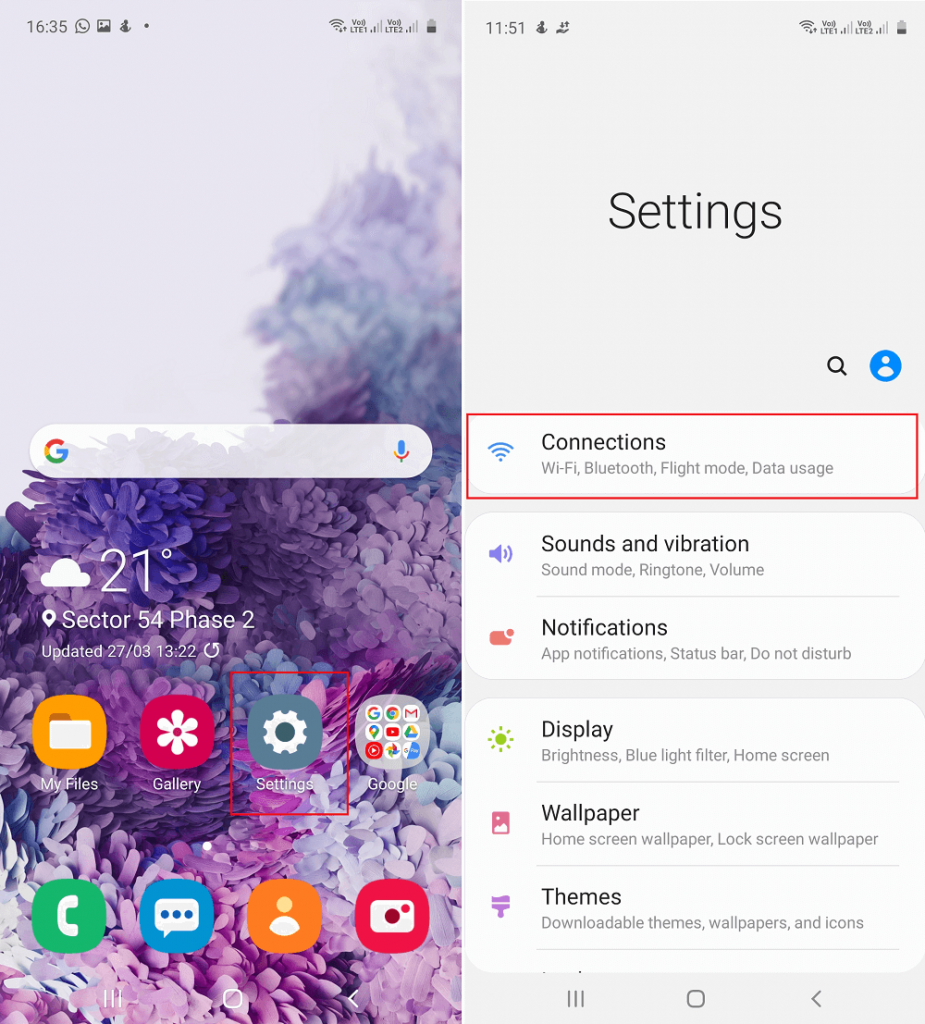
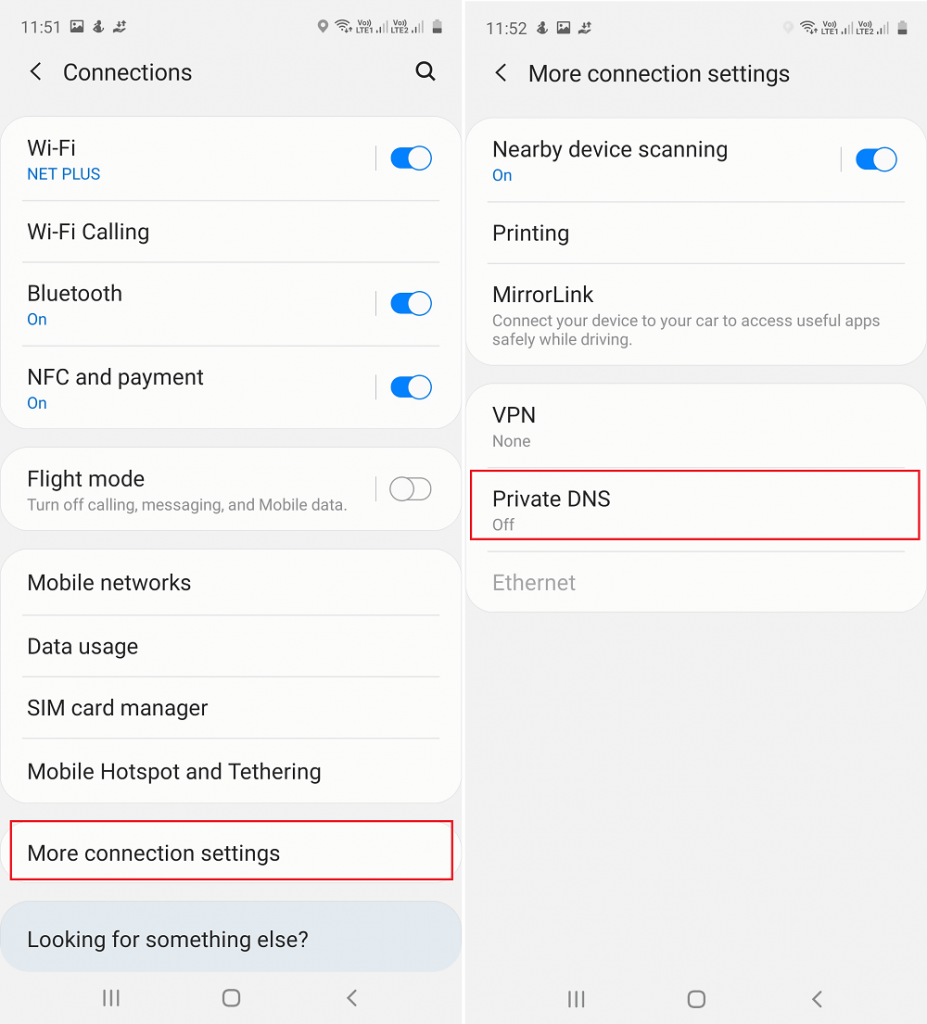
Fortunately, the devices running Android 9 or above have separate settings to change DNS, here’s what you need to do: In this blog post, I’m using Samsung Galaxy A51 running on Android 10 On your phone, launch Settings and then tap Connections. Next, tap on the ‘More connection settings‘ and then tap Private DNS. A quick Select ‘Private DNS provider hostname‘. In the available space type your custom or open DNS. You can use the following DNS:
Google DNS – dns.google instead of 4.4.4.4 or 8.8.8.8Cloudflare DNS – 1dot1dot1dot1.cloudflare-dns.com instead of 1.1.1.1
Copy-Paste DNS Server the one you want and then tap Save. The settings will take effect instantly. In case, you use VPN or other apps to make changes in network configuration, then DNS settings might be overwritten
Android 8.1 Oreo and older
In case, you have a phone running Android version 8.1 or below, then the official way to change DNS servers is by manually typing DNS in network connection (Wifi or Data)
To do so, you need to head over to Settings > Wi-Fi. After that, go to particular Wi-Fi settings. You will find a screen similar to the shown below:
Here, you will find two options DNS 1 and DNS 2. Here, you can add the following DNS:
Cloudflare DNS – 1.1.1.1 and 1.0.0.1.
And then save them.
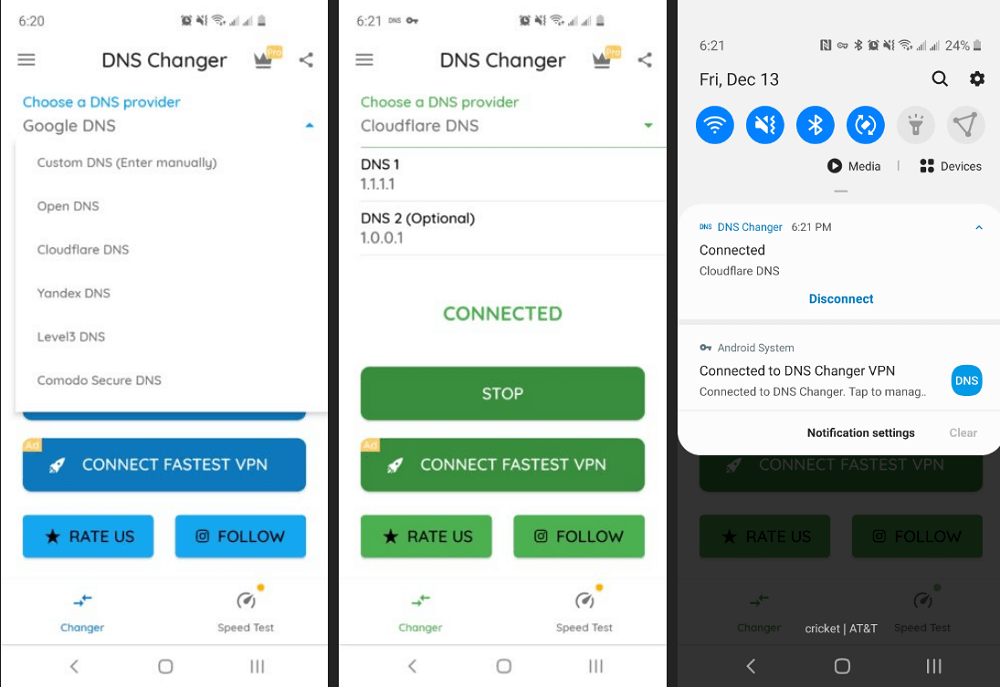
But typing the DNS server manually for each network connection is not a handy option. Fortunately, there’s a nifty android called DNS changer. It changes your DNS automatically and tests the speed of DNS servers.
Launch the DNS changer app and then select your DNS provider and it automatically and you’re done.
You might be interested in reading – How to Set up Cloudflare’s 1.1.1.1 DNS on Windows 10 PC
Find this blog post useful? We would like to hear your opinion in the comments.