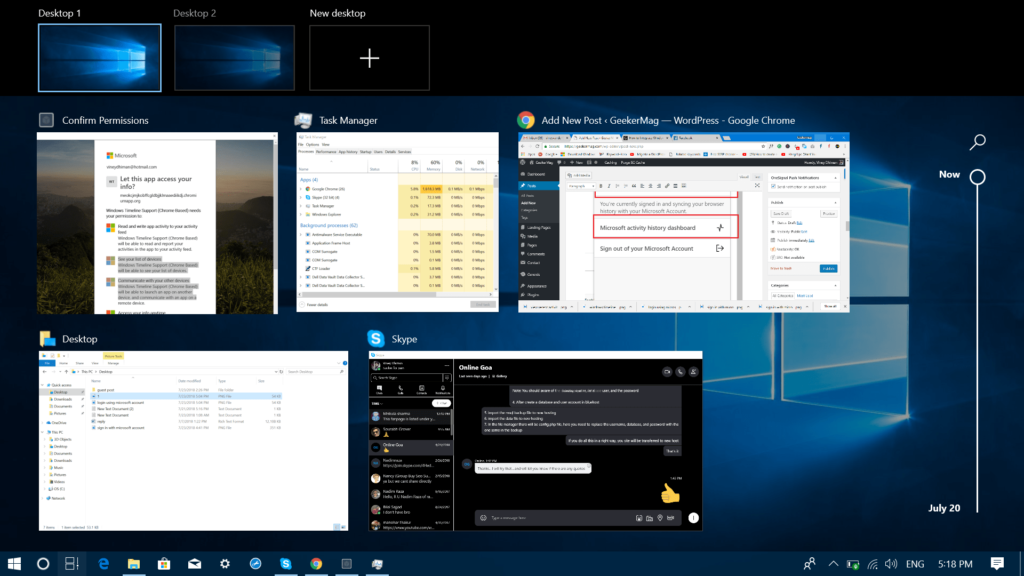
Start with Windows 10 April 2018; the company introduced lots of exciting and useful features, and one out of them is Windows Timeline. This productivity feature keeps track of all your activities of upto 30 days. Remember the Task View feature of Windows 10 where you find the recent running task accompanied by access to various desktops? The new Windows Timeline feature is available on the same location where Task View was located. It is a handy feature of Windows 10, but there is one problem. It only syncs browsing history from the default Microsoft Edge browser and lack support for other modern browsers like Firefox and Chrome. And there might be users looking for a workaround to use Timeline feature in the same browser.
How to Add Windows Timeline to Chrome and Firefox
Chrome and Firefox are two top web browser used by people all across the globe, so lack of Timeline integration is a big fail. Thankfully, there is a third party browser extension named as Windows Timeline Support. It helps users in taking advantage of Timeline feature until official support for both browsers is available. Here’s how you can set it up:
- First of all, you need to download and install Windows Timeline Support feature on Chrome or Firefox browser. Use following links
Windows Timeline Support for Chrome Windows Timeline Support for Firefox
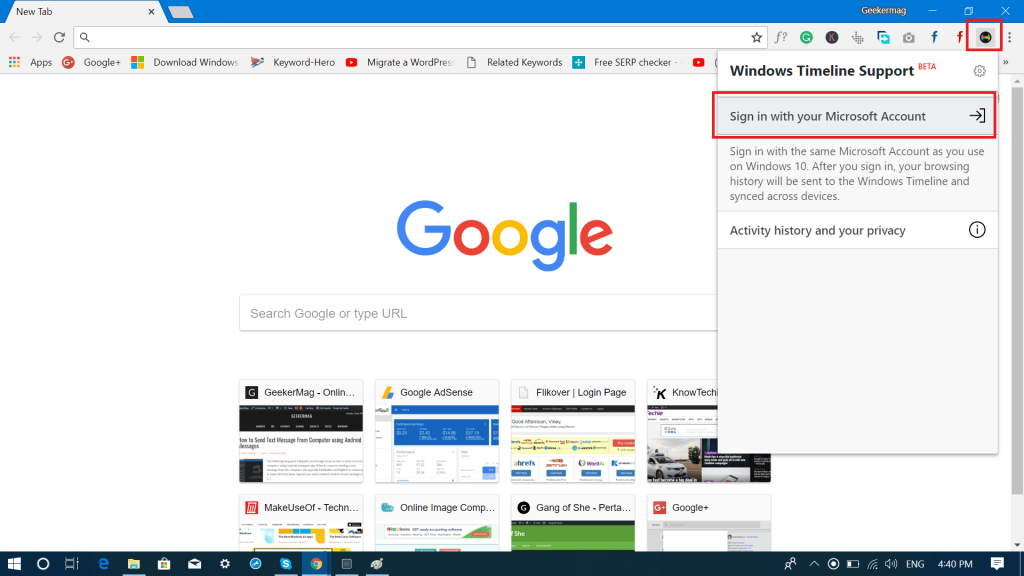
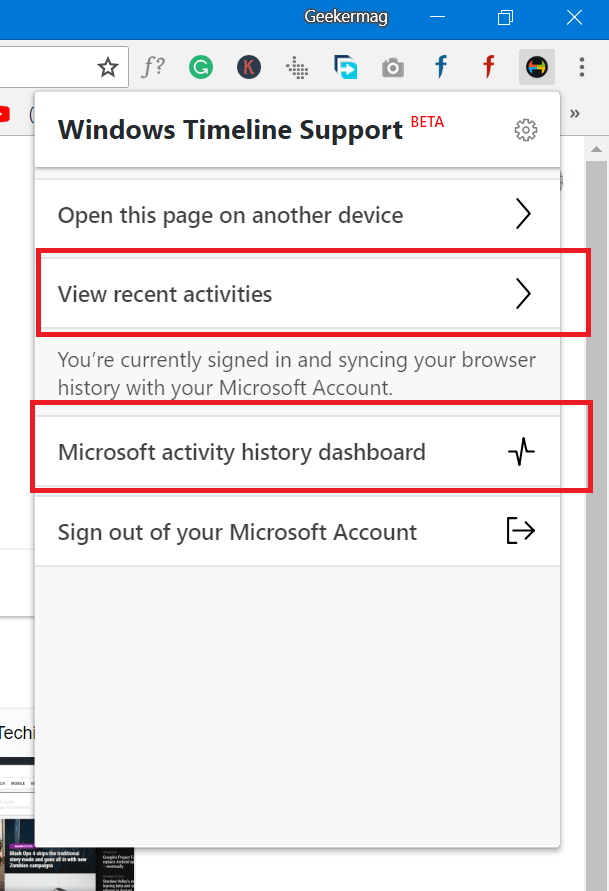
- Once installation completes, click on the extension icon available on the upper right corner to set up the extension.
In the menu, you need to click on the Sign icon next to “Sign in with your Microsoft Account.” This will open the new window.
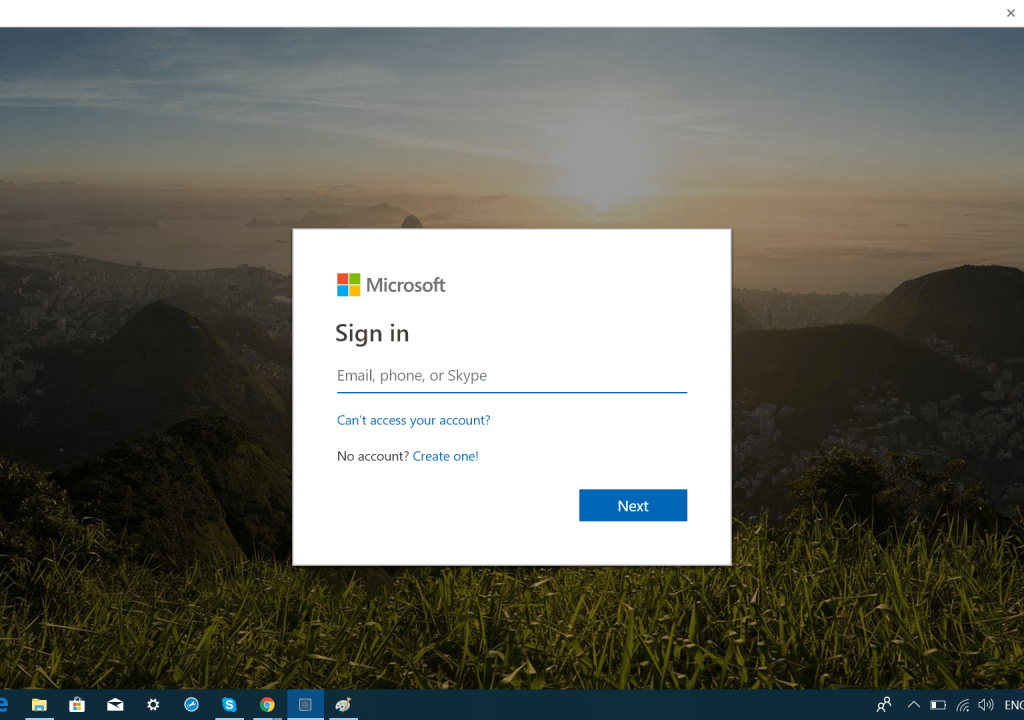
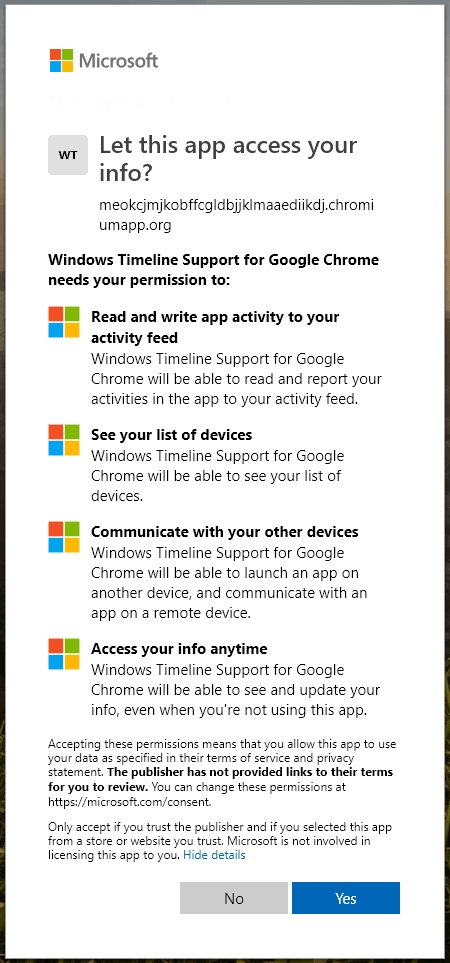
Here, you need sign in to the extension using the same Microsoft account, linked with the machine running Windows 10. Once you’re logged in, the extension will ask for the permission, Click on the Yes button. Make sure to check all the permission before initiating the process.
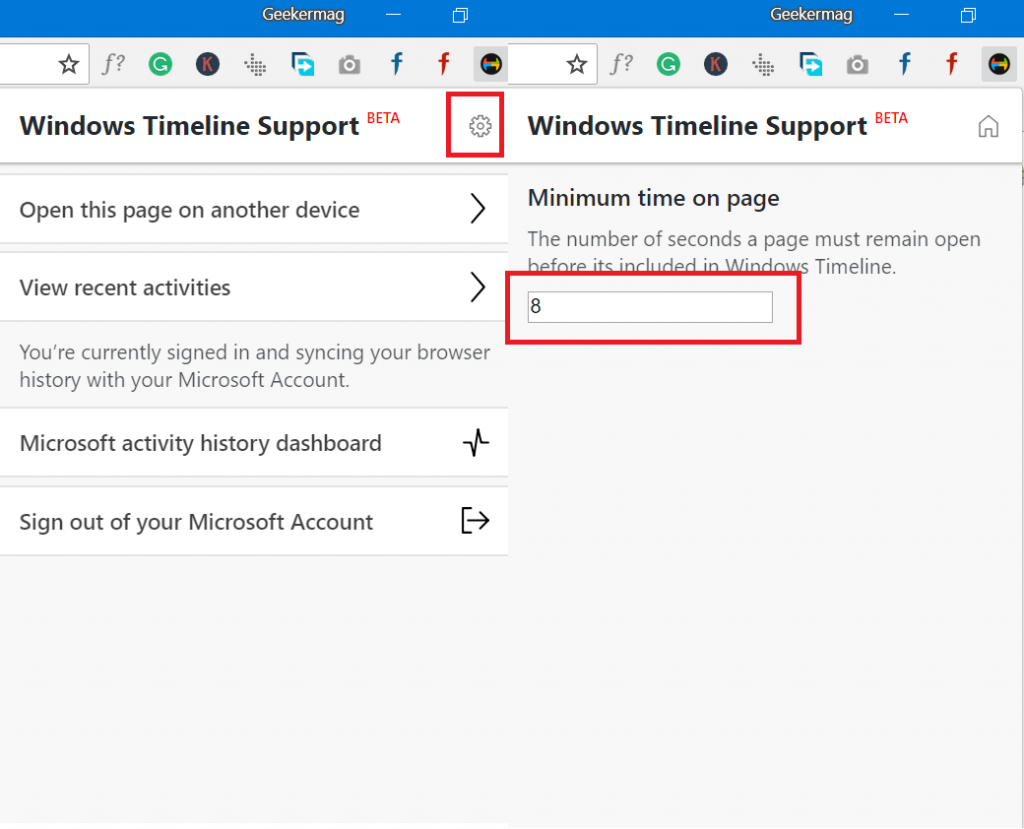
This is a freeware browser extension and works exactly as suggested. In case, you’re using different Windows 10 machine; then you can start browsing Firefox and Chrome on a single device and continue the work on the same tabs opened on other Windows 10 devices. When the extension is enabled, it will take a few seconds before all the activities to reach in the Windows Timeline. With default settings, your browser tab needs to remain open for 8 seconds to be included as a “Timeline activity.” But you can change this setting, under extension settings.
To edit it, click on the extension’s icon and then extension menu click on the Gear icon. Here, in the space provided under Minimum time on page enter the time period of your choice.
Apart from that, you can also track your Recent activities on the browser. You can also visit the Microsoft activity history dashboard for detailed information. If you know how timeline feature works with Edge browser, then you will feel the same with Chrome and Firefox browser too. As expected, you need to install Windows Timeline Support extension on other machines also (The browser). Find this blog post on how to integrate Windows 10 Timeline in Chrome and Firefox useful? I would like to read your opinion in the comments.